Behind the beauty of the High Desert are many environmental factors that create challenges for any gardener, from the novice to the expert. Learning how to work with these challenges can allow you to have a successful and beautiful garden. Some of the main factors that contribute to these difficulties are temperature, precipitation, soil types, elevation, USDA hardiness zones, and microclimates. This guide will provide you with gardening tips and techniques specific to Central Oregon so that you can have a more successful vegetable garden.
Central Oregon’s climate and how it relates to gardening
Many people are attracted to semi-arid Central Oregon because of its many sunny days and clear nights. Interestingly, on these clear nights, the ground and surface air cool significantly (a phenomenon known as nighttime radiative cooling), which can lead to having frost almost any time of the year, even during the growing season.
During the growing season, it is not unusual for the nightly minimum temperature to drop below 40°F. Periodically, this happens even during the hotter months of July and August. Higher elevations are especially susceptible and can have frost during the summer months. Frequent frost can negatively impact garden plants, reducing growth and yield. More tender vegetables in a garden can freeze between 24°F and 32°F during the growing season. Table 1 gives approximate dates of when it is safe to put frost-tolerant and frost-sensitive plants in your garden. Frost-tolerant plants are those that will not be damaged by a light frost. Frost-sensitive plants are those that may be damaged by a light frost.
| Location | Spring | Fall | ||
|---|---|---|---|---|
| 90% chance of 24°F or higher - Frost-tolerant plants can be planted | 90% chance of 32°F or higher - Frost-sensitive plants can be planted with protection in place. | 90% chance of 32°F or lower - Frost-sensitive plants may be damaged without protection | 90% chance of 24°F or lower - Frost-tolerant plants may be damaged without protection | |
| Bend | 20-Apr | 1-Jun | 21-Sep | 29-Oct |
| La Pine (at the Wickiup Dam) | 12-Apr | 27-May | 19-Sep | 27-Oct |
| Madras | 19-Apr | 25-May | 1-Oct | 22-Oct |
| Prineville | 20-Apr | 31-May | 12-Sep | 18-Oct |
| Redmond | 15-Apr | 29-May | 21-Sep | 28-Oct |
| Sisters | 25-Apr | 15-Jun | 6-Sep | 19-Oct |
In addition to the challenges imposed by freezing temperatures, Central Oregon’s climate has a wide range of temperature extremes between day and night (see Table 4). These temperature fluctuations often cause perennial plants to bud out prematurely, only to get nipped by frost at a later date. Cold injury can cause damage to flower buds when closed or after they open. This explains why getting fruit to set on fruit trees in this region can be challenging.
| Month | Bend | La Pine (at Wickiup Dam) | Madras | Prineville | Redmond | Sisters |
|---|---|---|---|---|---|---|
| January | 41.1 / 24.3 | 39.3 / 19.9 | 41.8 / 23.3 | 42.8 / 25.4 | 42.4 / 23.1 | 40.6 / 22.8 |
| February | 44.3 / 24.2 | 42.8 / 20.8 | 46.4 / 24.4 | 48.0 / 26.8 | 46.8 / 23.7 | 44.3 / 23.3 |
| March | 51.0 / 27.5 | 48.3 / 25.3 | 54.3 / 28.0 | 54.7 / 29.9 | 53.8 / 26.0 | 51.7 / 27.4 |
| April | 56.7 / 30.4 | 54.4 / 28.9 | 60.6 / 30.7 | 60.8 / 32.5 | 59.6 / 29.1 | 58.4 / 29.6 |
| May | 64.6 / 36.3 | 63.1 / 34.9 | 68.6 / 36.8 | 68.5 / 39.2 | 67.5 / 35.4 | 66.4 / 35.1 |
| June | 72.3 / 41.9 | 71.4 / 40.6 | 76.2 / 42.6 | 76.4 / 44.2 | 76.1 / 41.0 | 74.6 / 39.5 |
| July | 81.5 / 47.5 | 81.7 / 45.7 | 85.3 / 46.6 | 85.9 / 47.9 | 85.6 / 46.2 | 85.1 / 43.5 |
| August | 81.3 / 46.3 | 81.6 / 43.9 | 84.7 / 45.3 | 85.4 / 46.6 | 84.8 / 45.2 | 84.5 / 42.8 |
| September | 73.5/ 39.5 | 74.4 / 37.2 | 76.4 / 38.8 | 77.9 / 40.1 | 76.2 / 38. 2 | 75.8 / 36.4 |
| October | 61.9 / 32.8 | 61.6 / 30.4 | 63.4 / 31.0 | 64.9 / 33.6 | 63.5 / 31.3 | 62.6 / 30.2 |
| November | 47.3 / 27.9 | 45.3 / 25.9 | 49.3 / 27.3 | 49.8 / 29.4 | 48.9 / 25.8 | 47.4 / 26.5 |
| December | 39.4 / 22.7 | 37.6 / 19.6 | 39.8 / 21.8 | 40.9 / 23.8 | 40.5 / 20.7 | 38.9 / 21.2 |
| Annual Mean (1981 - 2010) | 59.7 / 33.5 | 58.6 / 31.2 | 62.3 / 33.1 | 63.1 / 35.0 | 62.2 / 32.2 | 60.9 / 31.6 |
The optimum air temperature for most plants is 50°F to 90°F. Growth slows down or ceases at low air temperatures between 32°F and 50°F. Cool evening temperatures are common during Central Oregon’s growing season, which can result in slow plant growth/maturation, decreased pollination, and reduced yields, especially for heat-loving crops such as tomatoes and peppers. To get a better understanding of temperature fluctuations in your garden, you may want to purchase a max-min thermometer and record daily temperatures.
Spring and fall months on the high desert do not warm up and cool down gradually like they do in more temperate regions. Sudden temperature changes can damage plant tissue (e.g., sapwood, buds, leaves) during the growing season or in dormancy. The growing season varies each year, due to low evening temperatures and frost occurrence; however, you can approximate the length of the growing season based on averages taken over the years (See Table 2).
| Location | Average Length of Growing Season (number of days) | Elevation (feet) |
|---|---|---|
| Bend | 90 - 100 | 3650 |
| La Pine | 70 - 80 | 4200 |
| Madras | 90 - 110 | 2230 |
| Prineville | 90 - 100 | 2840 |
| Redmond | 90 - 100 | 3060 |
| Sisters | 75 - 85 | 3180 |
| Sunriver | 70 - 80 | 4156 |
| Warm Springs | 100 - 120 | 1000 |
The growing season ranges from 60 to 120 growing days, with the shorter seasons occurring in the higher elevations and southern regions of Central Oregon, such as La Pine and Sunriver.
There are also many microclimates in Central Oregon. A microclimate is defined as the climate of a small area (e.g. your backyard or even a portion of your backyard) as opposed to that of a larger region. For example, a microclimate may be an area that is colder or warmer, wetter or drier, or more or less prone to wind. Some of the factors that affect a microclimate include cold air pockets, topography, wind, bodies of water, and the location of houses or other structures. Microclimates can affect the success of plants in your own backyard and should be considered when selecting vegetable varieties.
Precipitation, another factor that affects plant growth, is often referred to in terms of rainfall. In the high desert, natural precipitation ranges from 8 to 22 inches per year; however, most of it falls as snow during the winter. During the growing season (April through September), the amount of naturally occurring precipitation for Central Oregon is only 3 to 6 inches, making supplemental irrigation a necessity for most vegetable crop production (See Table 3).
| Month | Bend | La Pine (at Wickiup Dam) | Madras | Prineville | Redmond | Sisters |
|---|---|---|---|---|---|---|
| January | 1.53 | 3.05 | 1.3 | 1.12 | 0.97 | 1.89 |
| February | 1.09 | 2.48 | 0.96 | 1 | 0.65 | 1.31 |
| March | 0.73 | 1.78 | 0.81 | 0.87 | 0.66 | 0.98 |
| April | 0.78 | 1.31 | 0.92 | 0.87 | 0.73 | 0.95 |
| May | 0.89 | 1.23 | 1.01 | 1.17 | 1.02 | 1.21 |
| June | 0.7 | 1.07 | 0.68 | 0.92 | 0.64 | 0.86 |
| July | 0.56 | 0.71 | 0.54 | 0.56 | 0.53 | 0.53 |
| August | 0.48 | 0.75 | 0.34 | 0.34 | 0.5 | 0.44 |
| September | 0.41 | 0.65 | 0.41 | 0.38 | 0.41 | 0.48 |
| October | 0.6 | 1.37 | 0.85 | 0.83 | 0.65 | 1.05 |
| November | 1.39 | 3.05 | 1.25 | 1.18 | 0.96 | 1.86 |
| December | 2.2 | 3.87 | 1.38 | 1.44 | 1.16 | 1.97 |
| Annual Mean (1981-2010) | 11.36 | 21.32 | 10.45 | 10.68 | 8.88 | 13.53 |
Central Oregon increases in elevation as you go from north to south. The elevation in Warm Springs is 1,000 feet, which increases to 4,200 feet in La Pine. Locations at higher elevations tend to have winters that are longer and colder (see Table 2). Other effects of higher elevation include lower night temperatures, especially during the growing season, and more intense sunlight year-round; if excessive, both of these factors can reduce the rate of photosynthesis and crop yield.
Site selection
Selecting a site for your vegetable garden will depend on where and how much space is available, and, in some cases, neighborhood regulations. However, regardless of size, here are some of the more important factors to consider when selecting a site:
- Choose one that provides as much full sunlight as possible, ideally eight hours or longer during the growing season.
- Select a site close to a reliable water source and near your home for easy access to your garden. If the site is sloped, use terracing to help prevent erosion.
- Know your microclimate for the site, including the light conditions, wind, low spots in the topography, etc. Avoid planting in a low, cool, frost pocket. If necessary, divert prevailing winds by planting a windbreak.
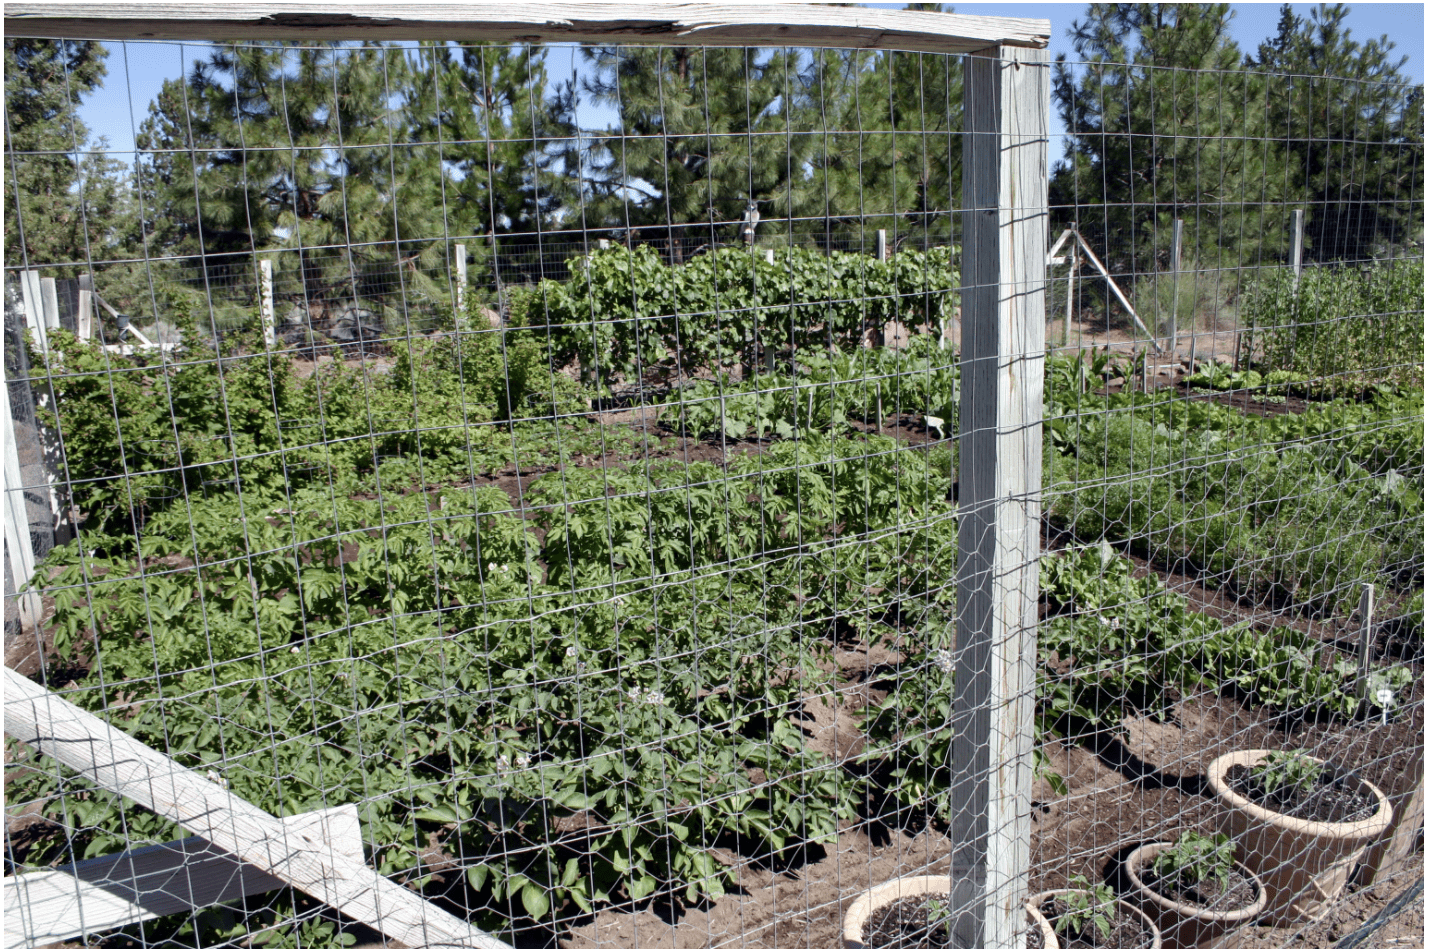
- Consider potential wildlife damage from deer, rock chucks, rodents, or rabbits. Have exclusion methods in place such as fencing, hardware cloth, or other coverings. If deer are a concern, the best type of management is a 6-foot or taller fence.
Soils and site preparation
Most native soils in Central Oregon are a fine sand to sandy loam, and tend to be very sterile with minimal organic matter (generally less than 1 percent). This type of soil does not hold high quantities of water or nutrients without some modification. Amending the soil with organic material such as compost or aged manure (free from weed seeds, disease pathogens, and herbicide residue) will help improve water holding capacity, soil microorganism activity levels, and the overall fertility of the soil. Ideally, sandy soils should have 2 to 3 percent organic matter.
Soil testing prior to planting can be useful to determine the soil pH and nutrient levels, allowing time for adjustments. Remove weeds and sod from the planting area to avoid competition for water and nutrients. The soil pH in Central Oregon is generally between 6.5 and 7.8. Most vegetable crops prefer a more acidic soil pH of 6.2 to 6.8, so in many areas the soil may require amendments to lower the pH. Soil pH affects a plant’s ability to take up nutrients, so it is important to achieve an ideal pH.
If your soil is too alkaline, add elemental sulfur in quantities of 4 to 6 pounds per 1000 square feet in the spring. Sulfur needs time to break down and gradually lower the soil pH, so the sooner (6 months to a year ahead of time) you can apply it to the site before planting the better. (See Improving Garden Soils with Organic Matter and Acidifying the Soil.) In other parts of the country, where soil is more acidic, adding lime is a common practice to increase calcium and raise the pH; however, this is rarely needed for backyard gardening in Central Oregon.
Ideally, you want to achieve 3 to 6 percent organic matter in your site, so continually add organic matter to the planting area each season. Vegetables require more nutrients from the soil than ornamental plants, and it will be important to replenish the site as needed. It may also be important to till the soil initially to alleviate soil compaction and turn in an amendment; however, be careful not to over till which can destroy soil structure.
You can add manures to your garden area in the fall to break down over the winter. Avoid using pig, cat, and dog manure as they can harbor pathogens that affect human health. If using horse, cow, or chicken manure, allow it to age for a minimum of 6 months so that the nitrogen levels are not too high.
Before acquiring horse or livestock manure, ask the supplier what the animals were fed, the origin of the feed, and what herbicides, if any, were used to spray the pasture to avoid using manure containing herbicide residue carryover. (See Herbicide Carryover in Hay, Manure, Compost and Grass Clippings: Caution to Hay Producers, Livestock Owners, Farmers and Home Gardeners.)
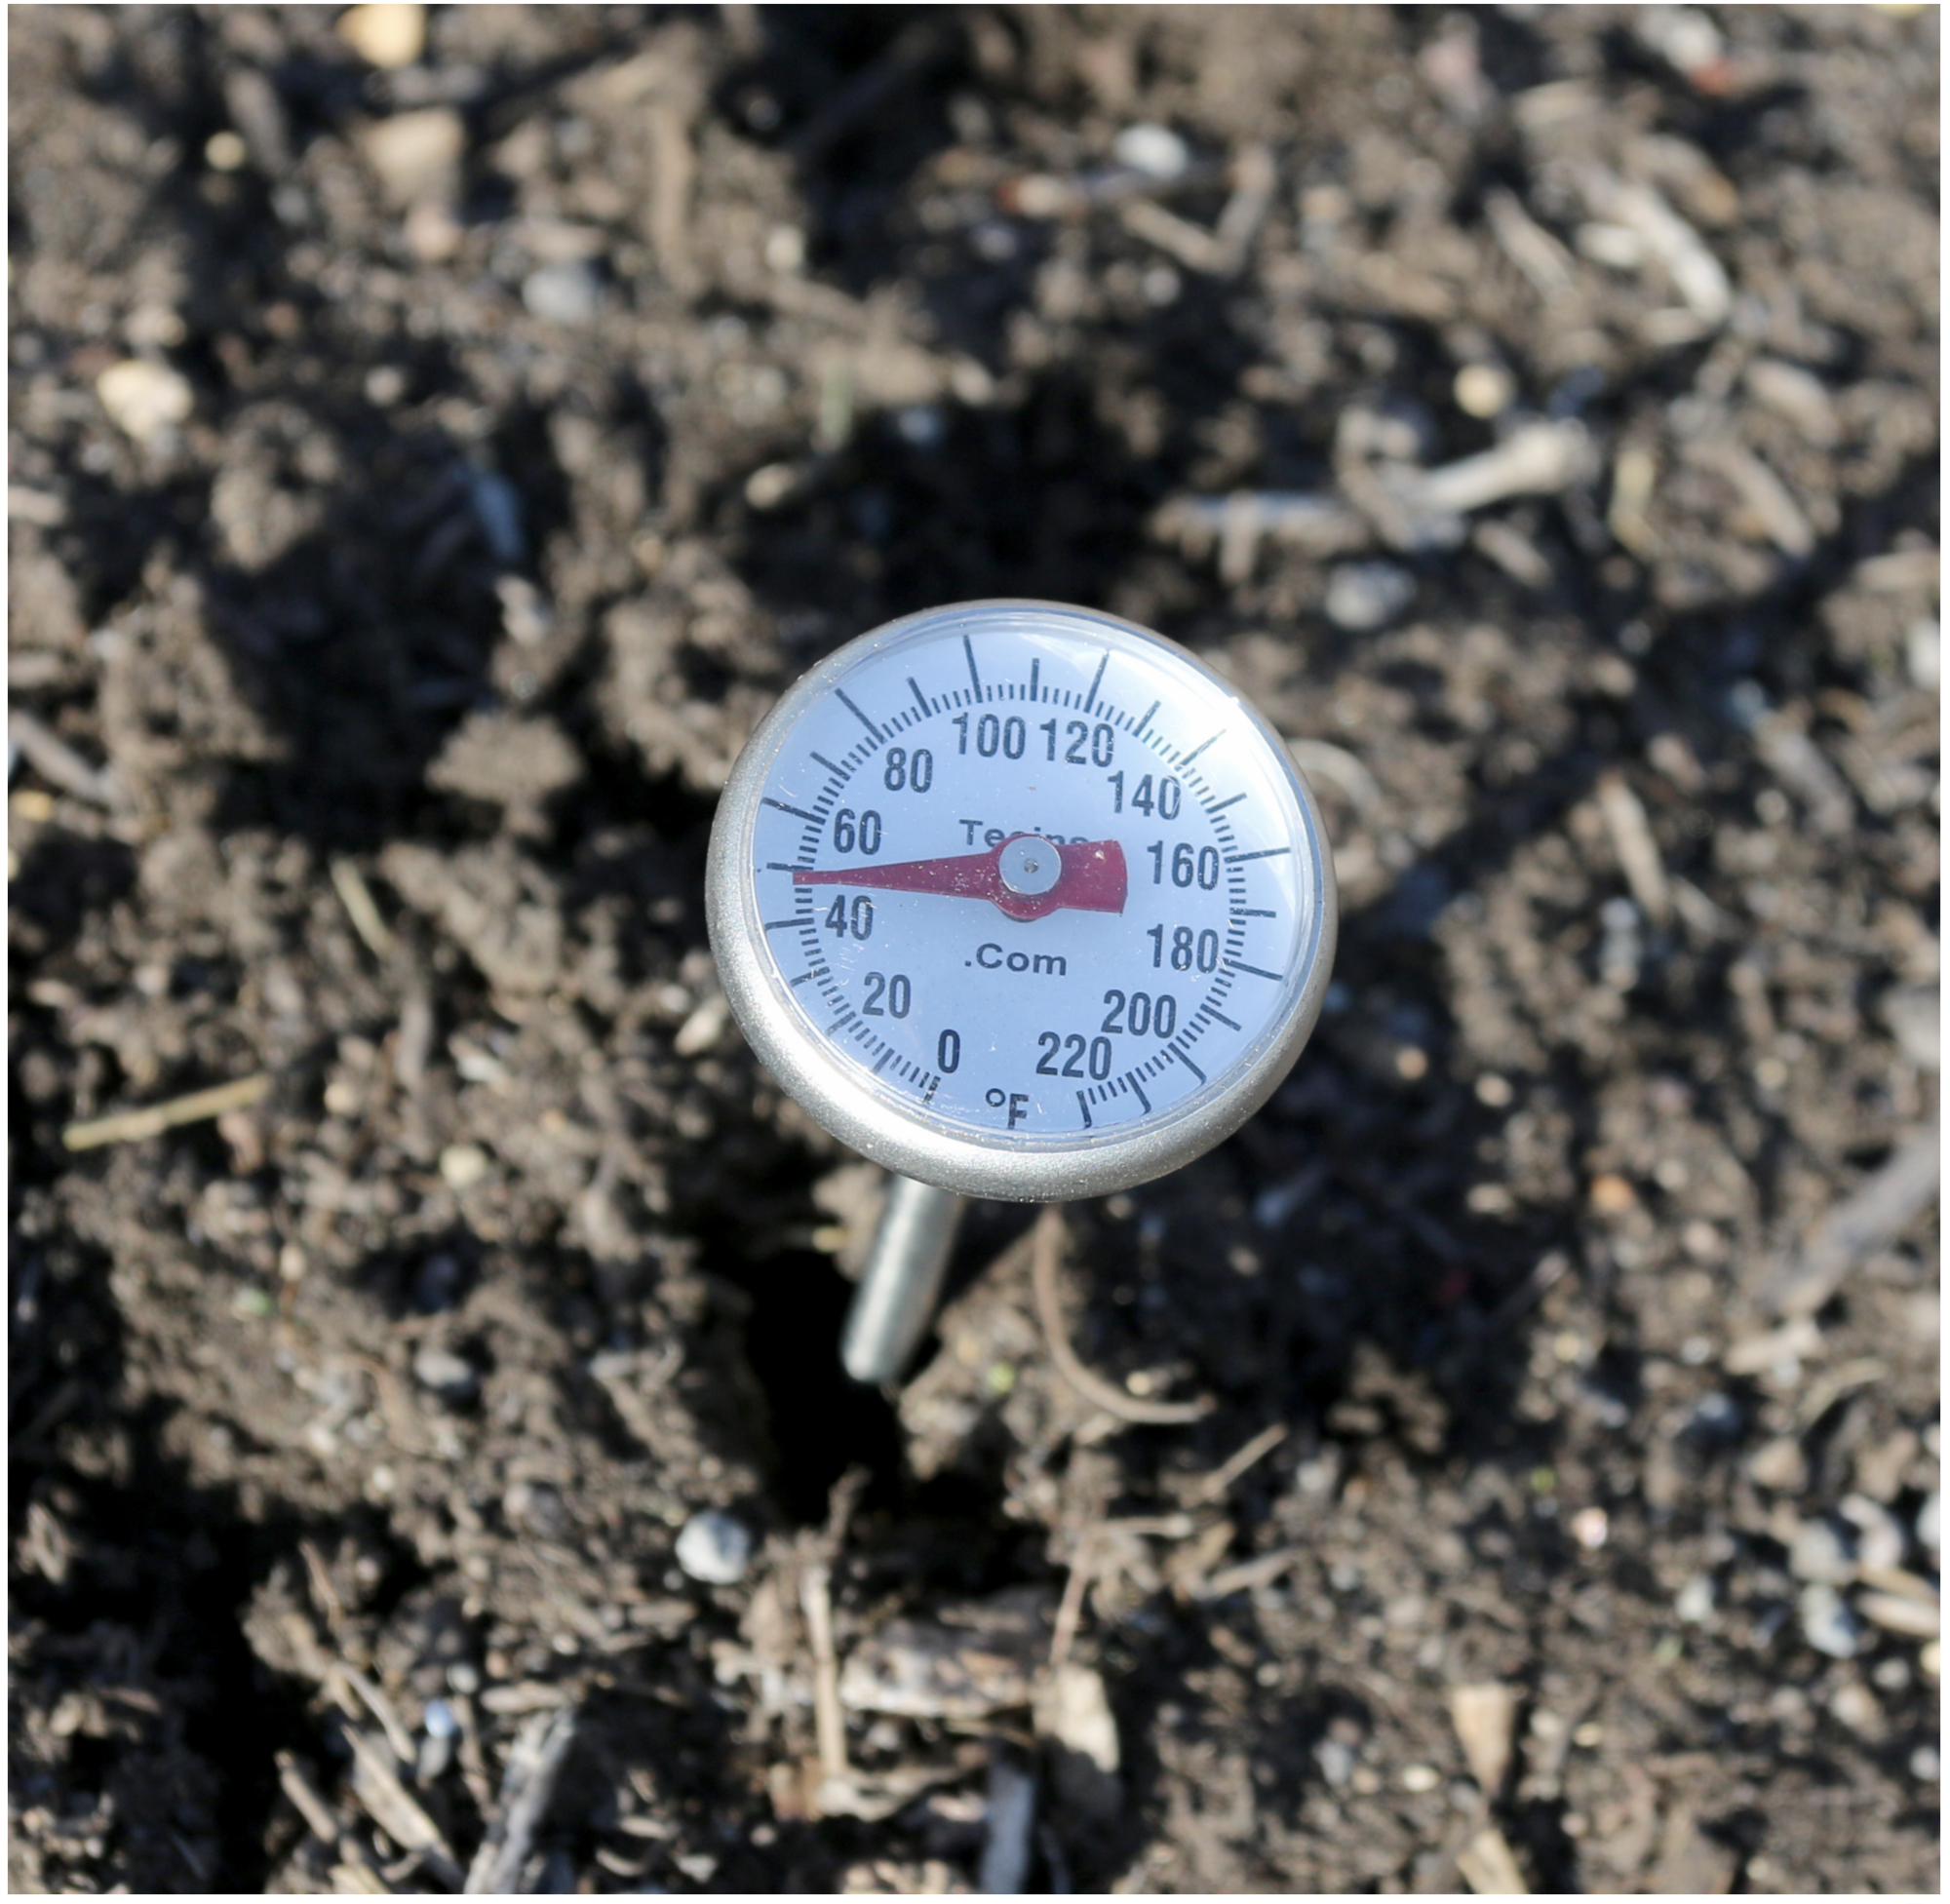
Soil temperature
Soil temperature plays a significant role in how fast a plant grows. If the soil is warmed to an optimum range for a particular crop, both plant growth and yield will likely increase. Most plants prefer a soil temperature of 60°F to 80°F for optimal root growth. In a short growing season, you can warm up the soil earlier than usual by judiciously using plastic mulches in the spring or by planting in raised beds, which heat up more quickly than the ground.
Cover crop use in Central Oregon
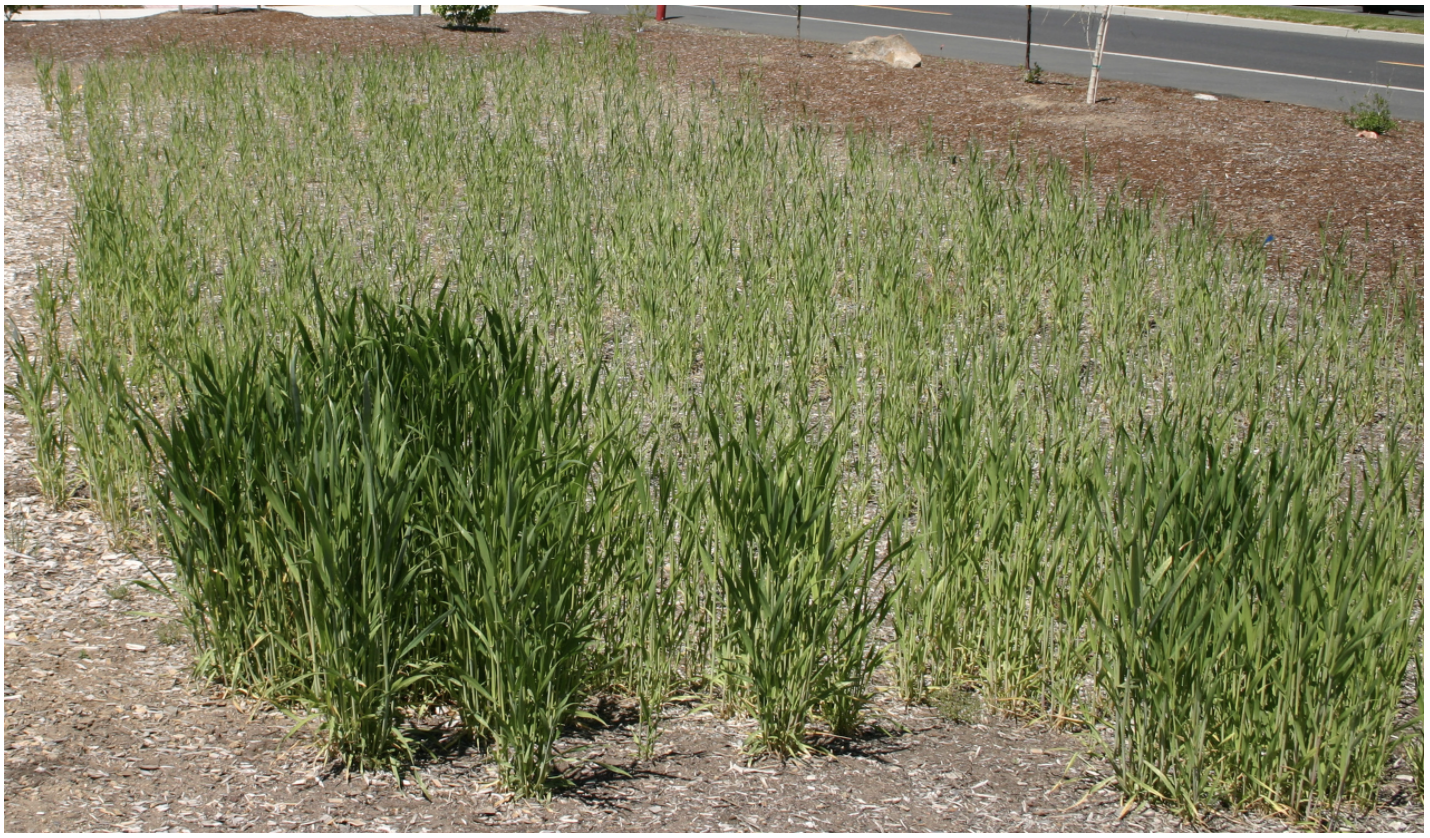
Consider using a green manure, or cover crop, in your garden area. A cover crop is a type of crop planted to prevent soil erosion, nutrient leaching, and weed growth between plantings of other plants. Generally, these are quick-growing crops planted either at the end or immediately before the start of the garden season; cereal grains and legumes are the most common types of cover crops grown in Central Oregon.
Ideally, a winter-hardy, fall cover crop should be planted a month or so before heavy frosts, so the plants can establish well. When the tops of young plants are winter-killed, just leave them lying on the soil as a cover; the plants will start to regrow in the spring. Cover crops can also be planted as fillers in between a spring and fall planting of cool-season vegetables.
Don’t let a cover crop go to seed, or it could become an unwanted weed in your garden. When a cover crop grows to about 6 to 10 inches tall or starts to flower, cut the plants from their roots by mowing, weed whacking, or shearing them with pruning shears. Then, turn all the plant material, including roots and tops, into the soil.
Because soil nitrogen will be used to break down the tilled-in cover crop, it becomes unavailable to new crops. Therefore, it is important to wait 2 or 3 weeks before planting your desired crop so that soil nitrogen will be available. If you don’t want to wait to plant the area, you can remove the cut tops of the cover crop and add them to a compost pile then lightly till in the roots and remaining top matter. Doing this will still provide some organic matter but won’t require as much soil nitrogen to be used in the break down process.
The use of cover crops helps build and protect garden soil and increases soil life (both microorganisms and macroorganisms). When growing, the cover crop protects the soil from exposure to weather and sun. When tilled into the soil, the cover crop adds organic matter such as cellulose and lignin, which helps give the soil good structure. The nutrients stored within the cover crop become available to soil organisms that then release these nutrients back into the soil to become available for plants again. Incorporating cover crops into the garden rotation can greatly benefit Central Oregon soils. Recommended spring cover crops include alfalfa, clovers, peas, and vetches. For a fall cover crop, consider winter wheat, cereal rye, triticale, winter barley, or winter peas.
Composting in Central Oregon
Composting is a great way to turn some of the garden, yard, and kitchen debris that typically goes to the landfill into an organic-rich amendment you can put back into your garden. The resulting organic matter feeds the soil, releases nutrients for plant use, conserves moisture, and adds air space into the soil. Composting, wherever it is done, requires the correct mixture of brown material, green material, air, and moisture. Hot composting can be very successful in Central Oregon if the pile is managed well.
The most critical aspect in a hot pile is moisture. Central Oregon compost piles are prone to drying out quickly, so it is important to check the moisture level in the pile weekly. If you are seeing ants in your compost pile, it may be too dry. For people using commercially made bins, it is important to add a dry material such as straw or shredded newspaper, either mixed with the wet waste or in alternating layers. This absorbs some of the excess moisture and, when layered, helps control the vinegar flies that are so common to small composters. (See Backyard Composting.)
Garden planning and design
Vegetables can be grown in a variety of arrangements, from a few small containers up to a large plot of land and everything in between. There are some innovative design sites available online that can assist you with spacing, garden layout, and suggested crop rotation. The following are some of the more common ways to design your garden.
Traditional gardening
Traditional vegetable gardening in the ground can be achieved with either a fixed plot or a flexible one, which can be modified each year for plant placement, crop rotation, pathways, etc. Plots in the ground will need to be amended with organic material to improve the growing environment and may need to be tilled initially, if compacted. Be sure the soil is pliable to allow for unrestricted root growth. Space rows accordingly for easy harvesting, weeding, etc.
Container gardening
Container gardening is a great option for growing vegetables if you have limited space, time, or money to invest. Another benefit is that it eliminates the poor soil conditions and soil-borne pathogens found in traditional gardening. For a container, you can use just about anything nontoxic (will not leach chemicals or heavy metals into the soil) that will hold soil and moisture, but consider the following tips to assure a more successful garden.
- Containers must have good drainage and provide enough rooting depth and space for the specific crop you are growing. For example, most tomatoes prefer a minimum rooting depth of 18 inches.
- Use a high quality potting soil and place your container in full sun with easy access to water. Soil in containers may dry out more quickly and require more frequent watering than soil in traditional gardens.
- Look for seed varieties intended for use in container gardens.
- Fertilize as needed.
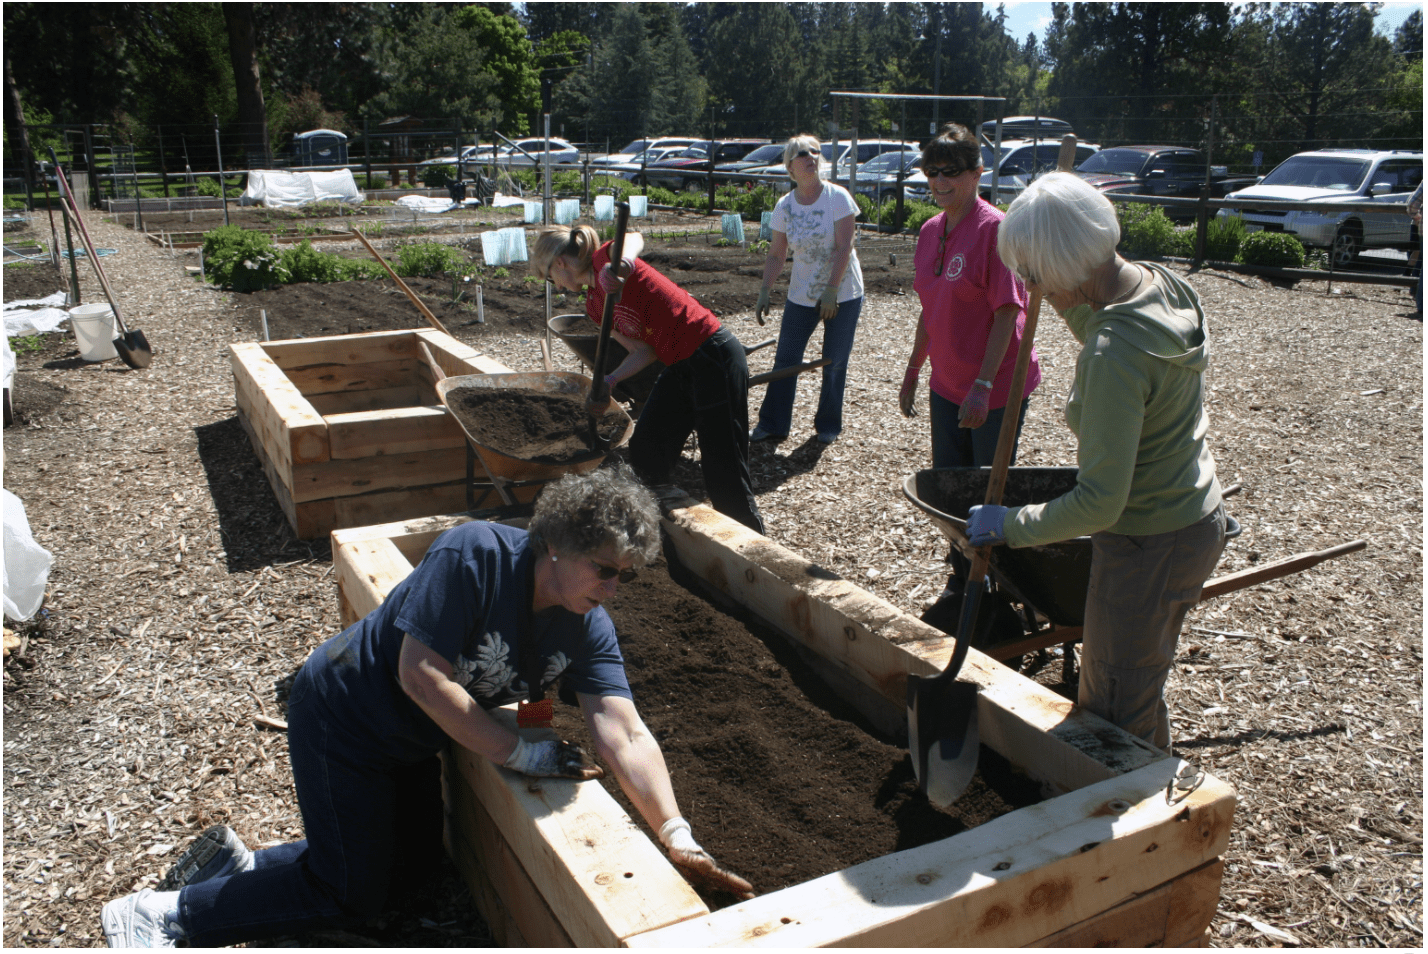
Raised beds
Raised beds are a great option for Central Oregon. Compared to an in-ground bed, the soil in a raised bed will warm up more quickly in the spring and will maintain heat longer into the fall, thus extending the season. Additional advantages of raised beds include improved soil drainage, less soil compaction, easy access, and more intensive gardening in a smaller space.
For raised beds more than 12 inches deep, limit their width to no more than 6 feet wide. This will allow you to access the center of the bed without difficulty.
The deeper the raised bed, the greater the need for good drainage, because a deep raised bed is basically a giant container garden. If designing a raised bed which uses structural supports such as timber or retaining wall blocks, fill the bed with a combination of soil amendments, one that will provide some organic matter and another that will allow for adequate drainage (e.g., coconut coir). One of the more common mistakes individuals make with deeper raised beds (18 inches or deeper) is to use un-amended soil with inadequate drainage, which will negatively affect plant growth. Do not use native soil or fill-dirt in deeper raised beds, as it will become very dense and compacted. The soil texture you are trying most closely to achieve is that of a premium potting soil.
If burrowing rodents are a concern, line the bottom of the raised bed with ¼-inch hardware cloth. When selecting timber for your raised bed, use untreated wood (cedar or western juniper posts); if you decide to preserve your timber, use a food-safe wood stain.
Vertical gardening
Vertical gardening is a technique in which trellises, cages, strings, poles, or other devices are used to support growing plants. Gardeners with limited space or mobility may particularly benefit from this style of gardening. As this type of gardening gains popularity, an increasing number of vertical gardening systems are now available. Plants with a vining-type growth habit such as pole beans, snap peas, and cucumbers are well suited for vertical gardening. Other sprawling vegetables can be grown vertically but may require structural ties.
Since plants growing vertically will be higher off the ground, they tend to dry out more rapidly and may require more water than in-ground garden plants. However, a benefit to this style of gardening is increased airflow, which may reduce certain plant diseases. Vertical gardening can also make monitoring insects and harvesting easier. Put these gardens in a place where they won’t shade out other plants behind them as they mature.
Other design tips
When designing your vegetable garden, don’t forget to include plants that will attract native pollinators and beneficial insects that can help increase your yield and reduce pest populations naturally. Consider planting annuals, perennials, trees, and shrubs that are either native or ornamental but non-invasive. For more information on planting for pollinators see additional resources. Also, remember to rotate your crops to reduce the buildup of insects and plant diseases. For more information on how to rotate crop families, see Vegetable Gardening in Oregon.
Irrigation
Central Oregon soils are predominantly sandy and fast draining. Adding soil amendments will increase the water-holding capacity to maintain sufficient moisture needed for overall plant health. Focus your efforts on providing the roots with even, consistent, and adequate moisture. Under watering can result in drought stress and shallow rooting, while overwatering can cause oxygen deprivation to the roots system, resulting in poor plant health or even plant failure in poorly drained soils.
When growing vegetables, there are several critical watering periods: during seed germination, after transplanting seedlings and throughout their 2- to 3-week establishment period, and during flower and fruit development. Fluctuations in watering during these times can negatively affect crop quality and yield. For example, tomatoes that are inconsistently watered develop surface cracks. The goal is to provide adequate moisture to the root zone for the crop you are growing, at a minimum depth of 6 inches if not more.
There are many different irrigation methods to choose from, and your selection will depend on the time and expense you are able to invest. Ideally, you should automate your system for consistent irrigation; however, manual irrigation can be just as effective if well managed. Consider seasonal adjustments to your irrigation schedule as the temperatures change during the growing season. Regardless of the irrigation method you select, the recommended time to water your garden is early in the morning. It is usually less windy and allows time for the foliage to dry off throughout the day.
Overhead sprinkler systems are the easiest and least expensive irrigation system to install but can potentially encourage plant diseases such as powdery mildew on certain crops like squash. Overhead irrigation can also encourage more weed germination than more targeted types of irrigation. Additionally, as plants mature, they can block overhead irrigation, creating dry zones in the garden. Overhead irrigation may be the best option for large vegetable gardens but is generally not the most water efficient.
Soaker hoses are another less expensive irrigation method and can be easily moved around and placed where needed as you change your planting layout from year to year. Some gardeners choose to bury their soaker hoses 1 to 2 inches in the soil. Check each hose before installation and after use in the fall for pinholes and clogging and replace as needed.
Drip line systems with drip emitters or micro sprays are a more expensive method but are also the most effective in terms of water efficiency. This type of irrigation works well in smaller vegetable gardens, particularly those with raised beds. Micro-spray emitters are recommended over drip emitters because they provide even, consistent coverage for the root zone, which is especially important for native Central Oregon soils. If you are using non-potable water, this system may clog with dirt, algae, and salt buildup.
Fertilization
Plants require nitrogen (N), phosphorous (P), and potassium (K), among other nutrients, for optimal growth. Nitrogen is a component of chlorophyll, which allows plants to absorb energy from light and make food in a process called photosynthesis. Phosphorous and potassium are essential for leaf, stem, and root development. Plants can acquire some of these nutrients through the addition of organic-rich amendments (e.g., compost) to the soil.
In addition to amending the soil, you may want to use a fertilizer depending on soil fertility, the type of crop being grown, and the type of fertilizer being used. Some crops such as tomatoes and peppers are heavy feeders and require more fertilization than others. Organic fertilizers derived from plants or animals are generally slower to release their nutrients than synthetic fertilizers derived from minerals or chemical processes. Both organic and synthetic fertilizers provide nutrients to plants. Ideally, you should determine the type and amount of fertilizer to use for your crops based on soil test results.
Soil temperature can affect the ability of microbes to break down both organic and synthetic fertilizers.The colder the soil, the slower the microbes break down nutrients, making them less readily available.In areas with a shorter growing season, it can be advantageous to use soluble fertilizers earlier in the season so that nutrients are available sooner. In particular, if nitrogen is available earlier, plants may grow more quickly, compensating for the shorter growing season.
A general, well-balanced fertilizer, such as 10-10-10, can work sufficiently for most crops in backyard gardening. Apply fertilizers according to label directions. Nitrogen will leach out more readily in sandy-type soils as compared to clay-type soils. Judicious applications of a nitrogen-rich fertilizer will help plants to photosynthesize at high rates, resulting in healthy plant growth. However, using too much nitrogen or phosphorous can result in excessive plant growth, limiting overall fruit production and increasing insect and disease damage on plants. Another potential consequence of overfertilizing is unintended phosphorous runoff to surface waters.
Mulching and weed management
Mulch can be used to reduce evaporation and help maintain even and consistent soil moisture. It can also reduce weed growth. You can use weed-free hay or straw, herbicide-free grass clippings, rotted sawdust, wood bark chips, or compost as organic mulching materials. Apply a thin, even layer no more than 5 inches deep around your crop after the soil has warmed up in the spring. If applied too early in the season, the mulch will actually keep the soil cooler longer.
For weed control, use integrated weed management practices. Monitoring for problem weeds is the first step in this process. It is important to know when weeds are present in your garden and how many there are. Identifying the weeds is another important step in the process. Once you have properly identified a weed, you can learn the life cycle of the weed, how it spreads, and therefore the most effective way to control it. There are several ways to manage weeds, including hand cultivation, mechanical cultivation, and herbicides, if applicable.
Pest management
Besides threats from wildlife and weeds, as referenced above, vegetable gardens are also susceptible to environmental damage, insects, or plant disease. Environmental damage (heat, cold, drought, etc.), a gardener’s greatest threat in the high desert, has already been addressed in this publication.
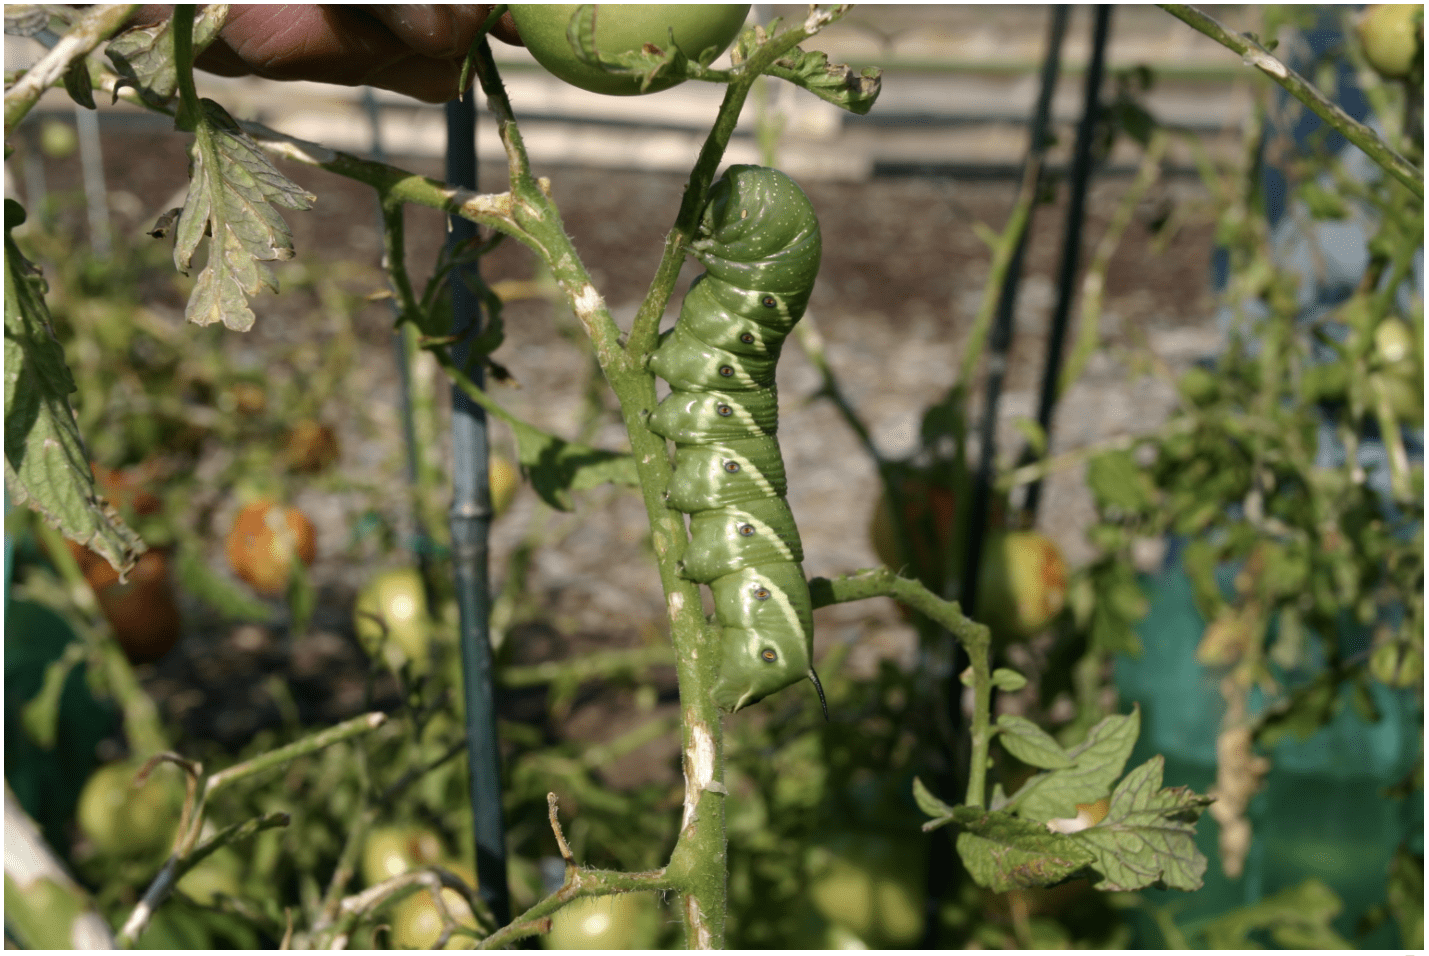
Common insect pests in the high desert include aphids, flea beetles, cabbageworms, tomato hornworms, squash bugs, leafhoppers, wireworms, cutworms, whiteflies, leafminers, and others. Fortunately, Central Oregon has a lot less plant disease caused by fungus, bacteria, virus, etc. compared to more temperate climate areas. Some of the more common pathogens that cause disease include powdery mildew, leaf spot, and blights. For the most current information on how to manage for insects and disease in the garden using integrated pest management, go to the Pacific Northwest Insect Management Handbook and Pacific Northwest Plant Disease Management Handbook.
Seed selection
All aspects of gardening require advance planning, including seed selection. Vegetable seed selection depends on your preferences and needs, space available, and time that you can allocate to gardening. You will need to decide which seeds can be given a head start by beginning indoors and which seeds can be sown directly in the garden.
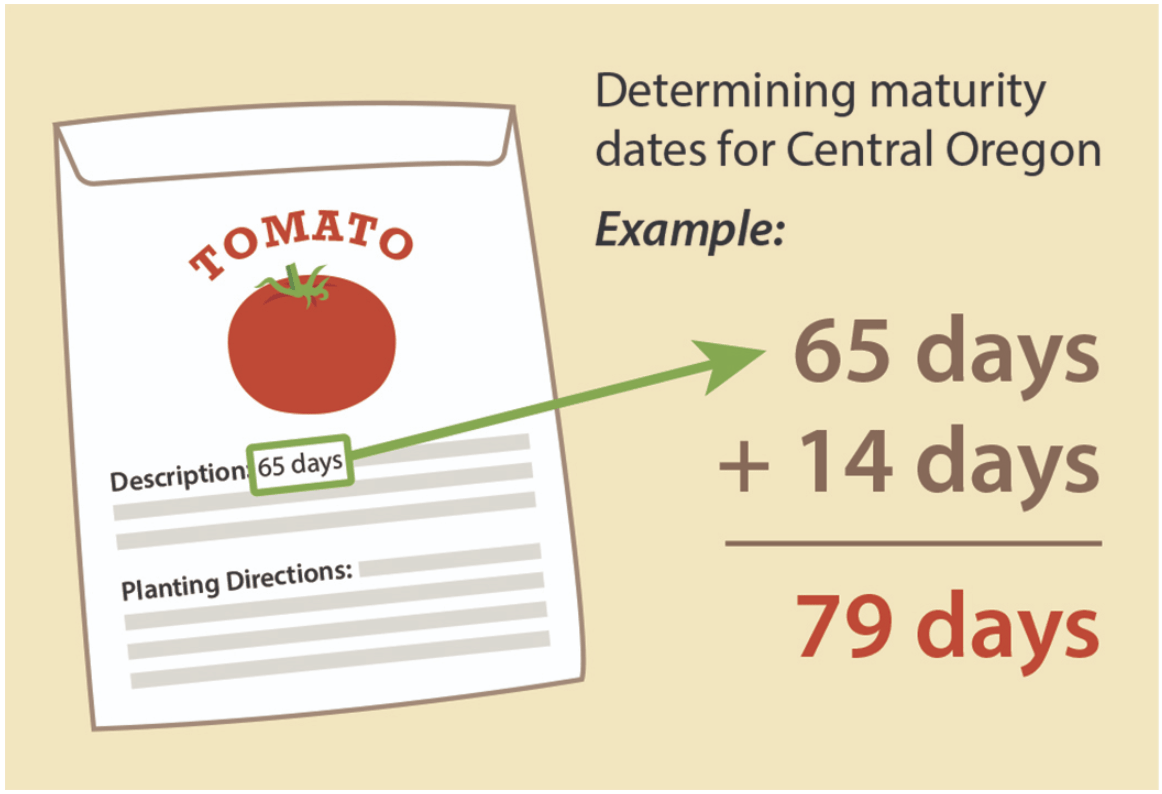
Choosing the correct variety for Central Oregon’s climate helps ensure success. The maturity date listed on the seed packet or in the catalog should fall between 65 and 75 days. To compensate for the temperature swing of warm days and cool nights, add 14 days to the given maturity date on a seed packet to get a more realistic sense of when a plant will reach maturity.
Before you decide to start seeds indoors, consider if you have sufficient space, light (or room for supplemental lighting), warmth, and moisture. Most seeds need to be started 6 to 8 weeks before the start of the growing season (generally the first to second week of June). Warm weather crops, such as tomatoes, peppers, eggplant, melons, squashes, cucumbers, and watermelons, are more successful if started indoors and then transplanted when soil and air temperatures have risen enough to sustain growth. These crops are considered frost tender and will need to be planted with frost-protective measures in place when transplanted into the garden (see Season Extension).
Starting seed indoors
Use a seed starting mix as the planting medium for indoor seed starting. Seeding mixes provide adequate drainage for seeds and small starts. Other media, such as garden or potting soils, hold too much moisture and may cause the seeds to rot before germinating. Use a seeding flat no deeper than 2 or 3 inches. Any type of container can be used provided it has drainage holes.
Premoisten the seeding mix in your flat before planting. To premoisten your seeding mix, set your flat in a sink or basin filled with 1 to 2 inches of water. The water will draw up into the flat, moistening the soil more effectively than surface watering.
Plant seeds according to the depth listed on the seed packet. Seed packets will advise if the seeds need to be covered or if they need light to germinate. Most vegetable seeds do not require light until they sprout. After planting, mist your seed flats, cover them with plastic wrap or a plastic dome, and set them in a warm place to germinate.
Successful germination depends on soil (not air) temperature, moisture, and, in some cases, light. Recommended soil temperatures for most seeds are between 70°F and 80°F. Consider purchasing a soil thermometer to measure soil temperatures both indoors and out. To increase the soil temperature in your seed flat, try placing it near a floor register, on top of a refrigerator, or on a grower’s heat mat.
Monitor the moisture level daily in your flats—the mix should feel damp but not soggy. Once your seeds have germinated, remove any covering, and move your flat to an area with high light, either from fluorescent grow lights or from the sun. Artificial lights are usually left on 12 to 16 hours a day, placed as close to the emerging seedlings as possible and then raised as the seedlings grow.
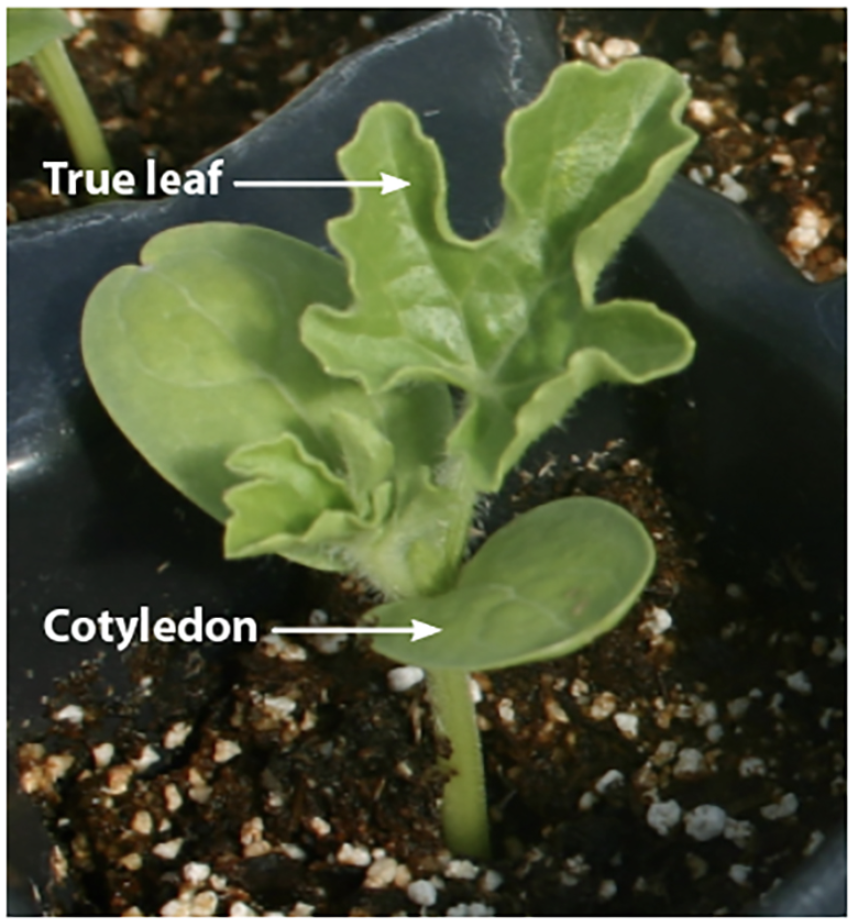
Fertilizing is not necessary early on—the seed contains everything it needs to germinate and develop several sets of leaves. The first set of leaves are cotyledons, recognizable by their rounded shape. The next set of leaves to emerge are true leaves, which will be the shape of the mature plant leaves. At this point, seedlings are ready to be transplanted into a larger pot with potting soil or out in the garden if the timing is right.
All seedlings started indoors should be hardened off. Hardening off is a process of introducing the seedling to an outdoor, somewhat protected environment for a few hours a day, increasing exposure over a period of 7 to 10 days. Transplant seedlings into pre-moistened soil, either on a cloudy day or early in the day. The recommendation for transplanting seedlings out in Central Oregon is the first to second week of June.
Direct seeding in the garden
Using a soil thermometer will help you successfully germinate seeds sown directly in the garden. Seeds need a minimum soil temperature to germinate (see Table 5). Ideally, you wait for the optimum soil temperature when seeding, but, realistically, you may need to seed somewhere in between the minimum soil temperature and optimum soil temperature to assure a higher germination rate and provide a long enough growing season for your crop. If the soil is too cold (lower than the recommended minimum soil temperature), the seeds may rot before they germinate.
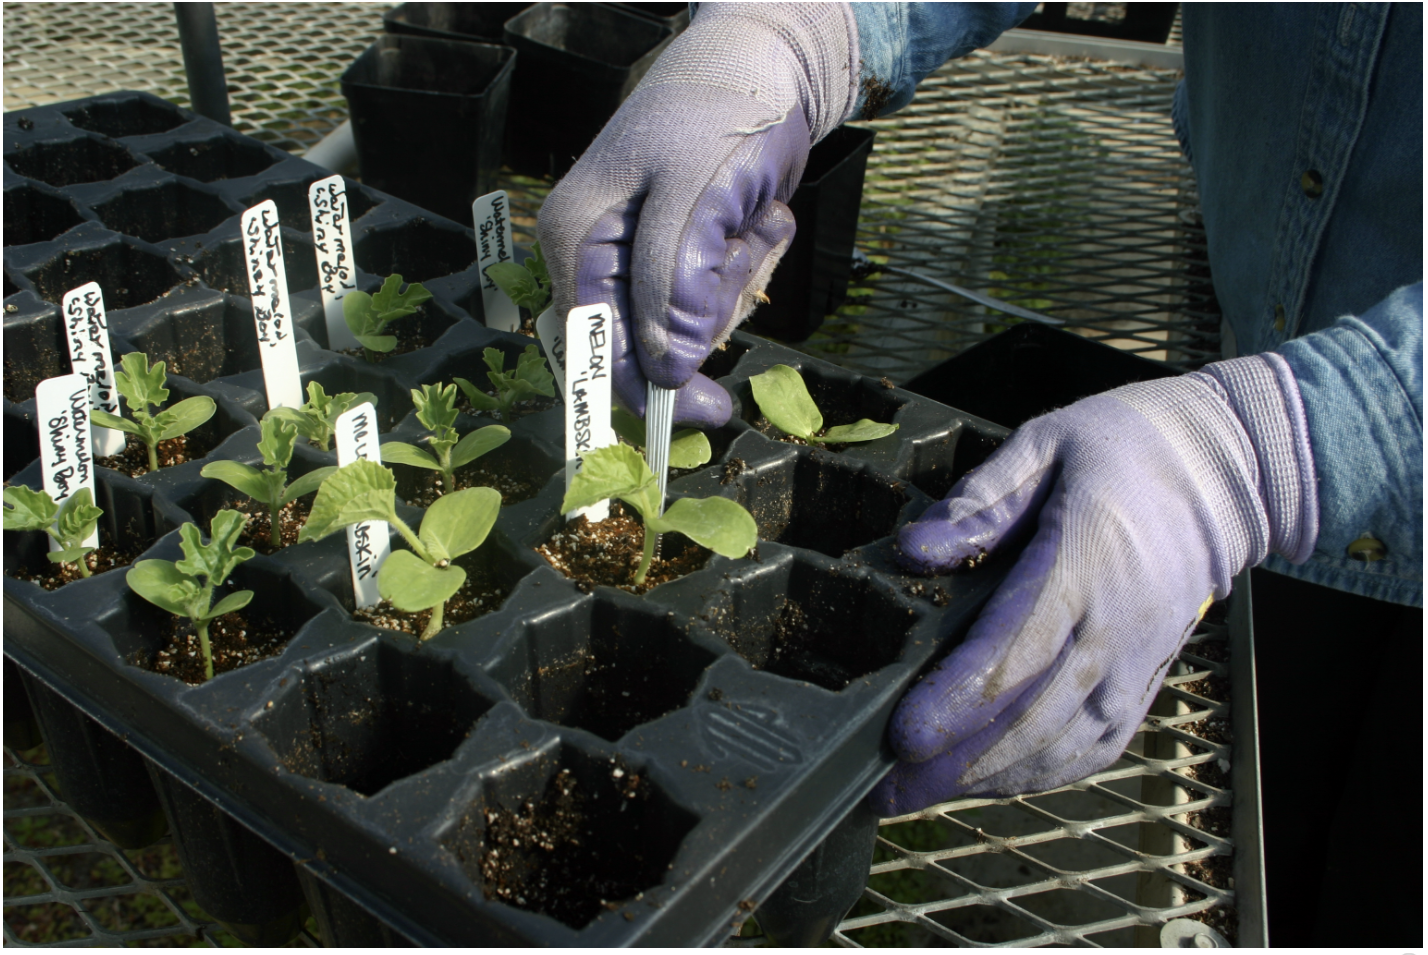
Seeds should be planted in soil that has been irrigated the day before planting. Seed packets will list recommendations for planting depth and spacing between seeds and rows. Carrots, radishes, and lettuce have a shallow planting depth and benefit from a light sprinkling of compost or fine potting soil over the seeds. Lightly irrigate after planting to settle the seeds. Label the rows and record the seed varieties and their locations in a garden journal.


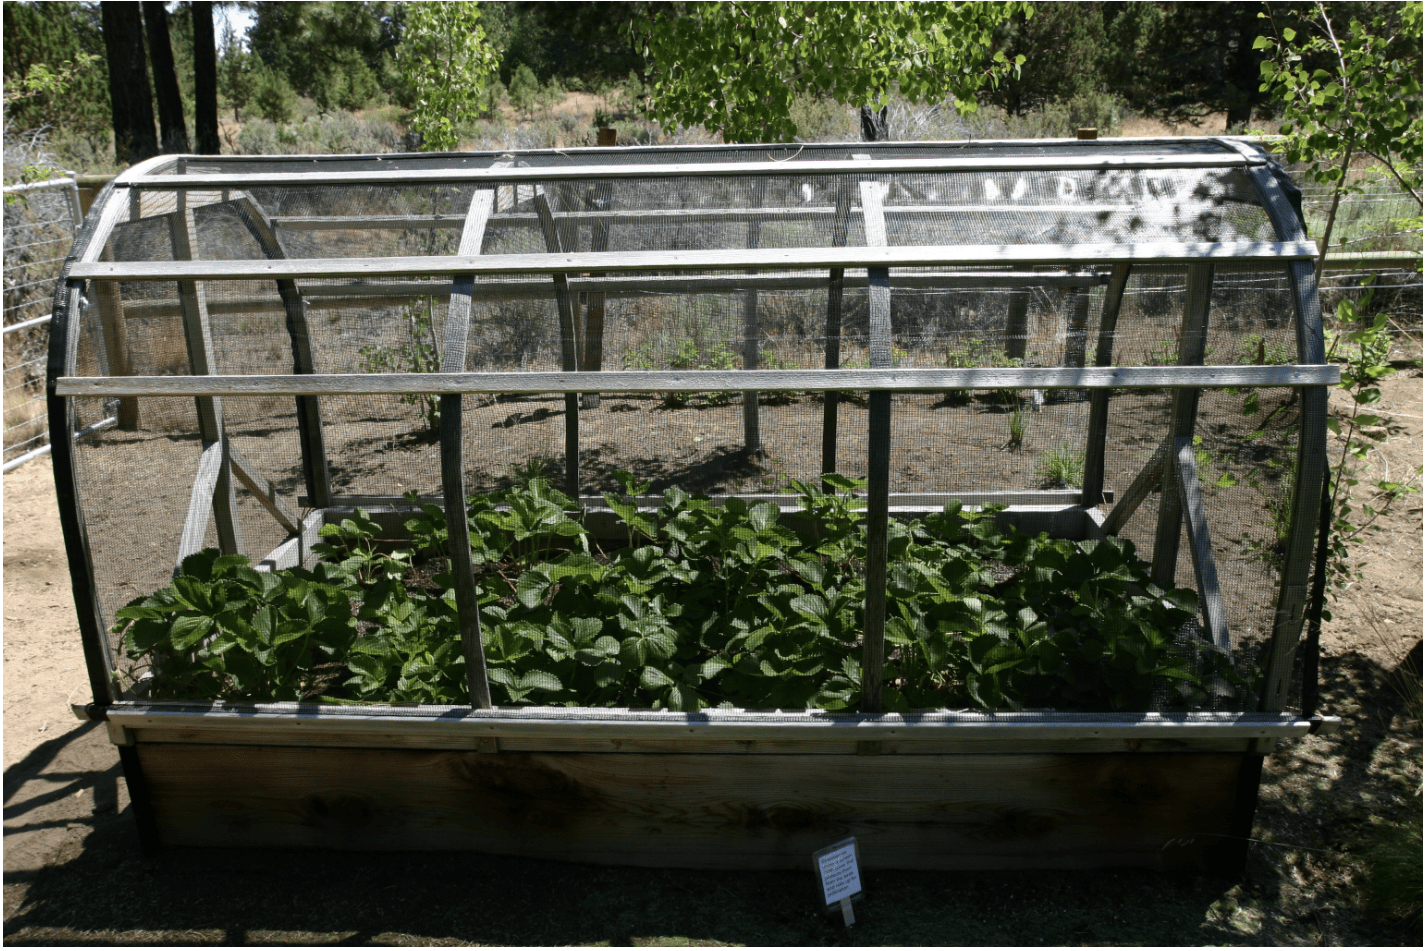
Season extension
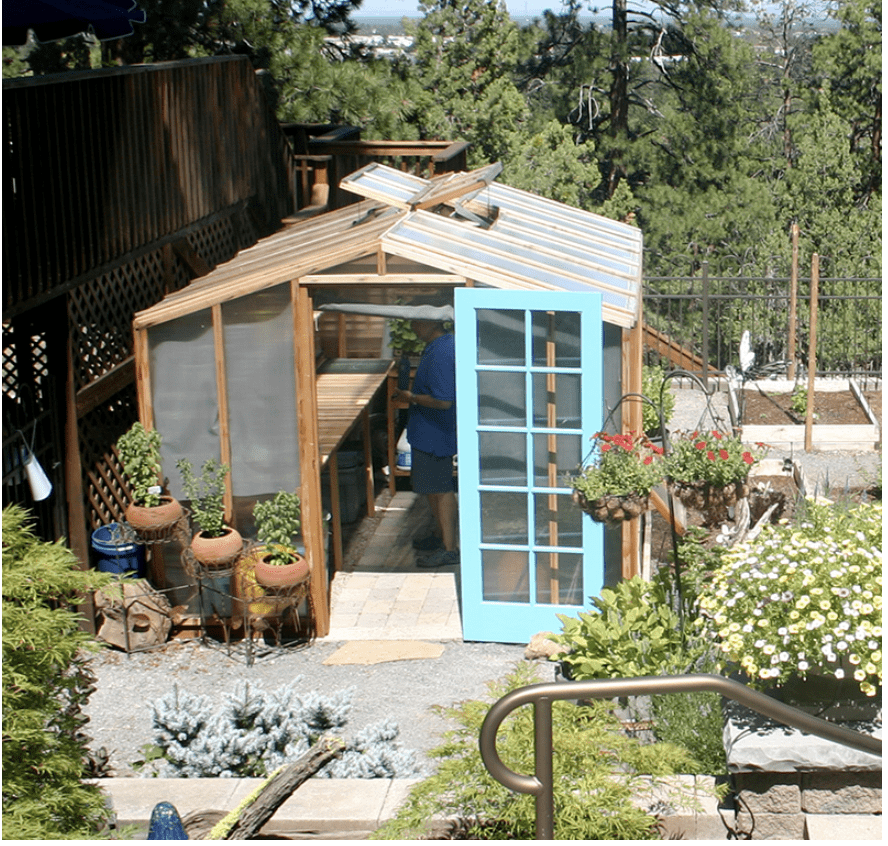
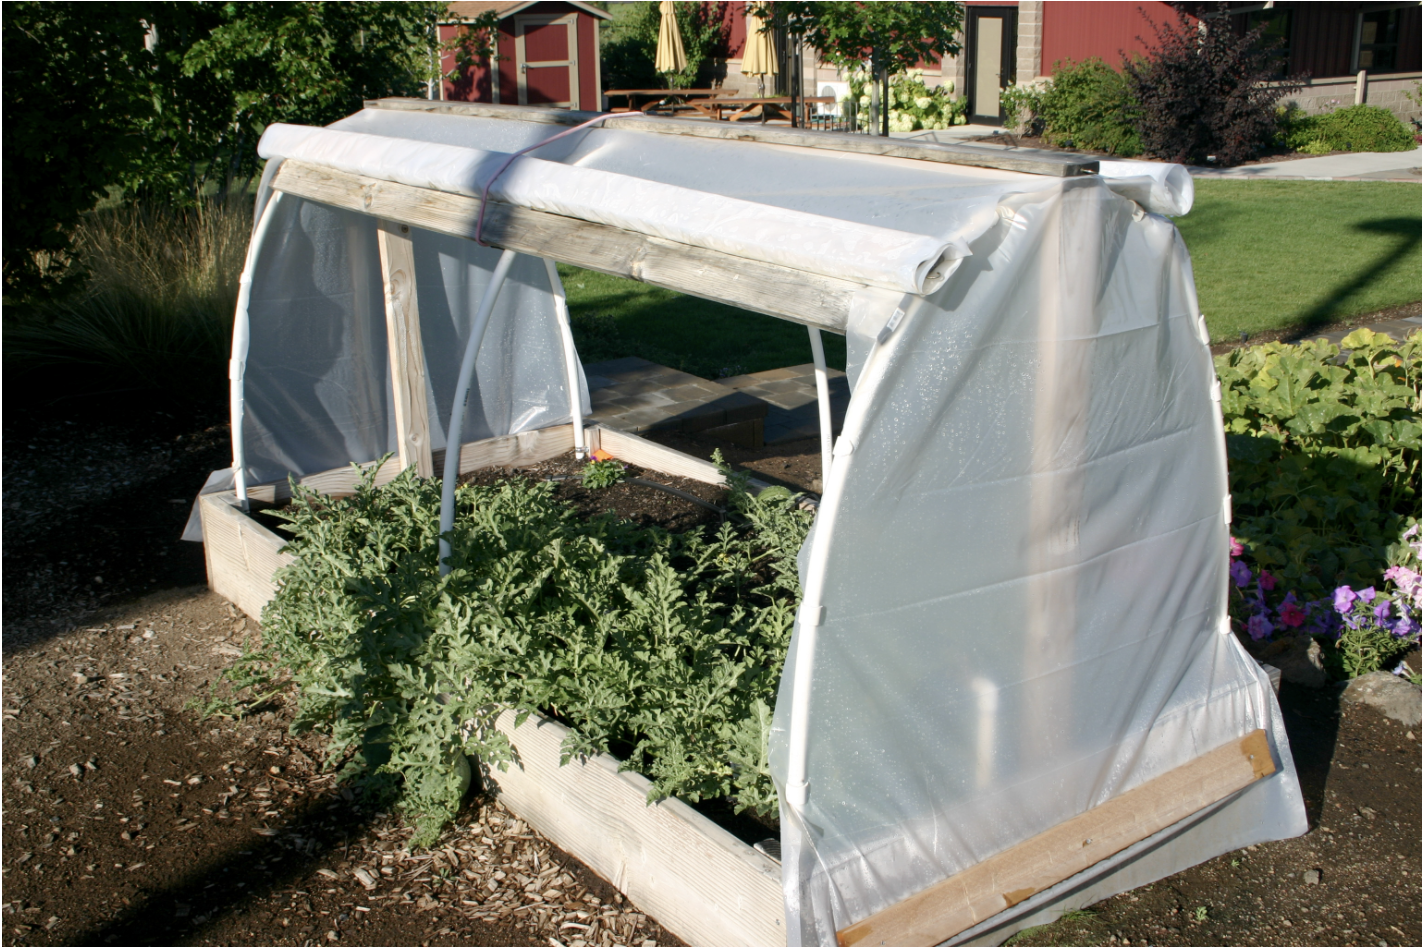
Season extension refers to anything that allows a crop to be cultivated beyond its normal outdoor growing season. In Central Oregon, it is highly recommended to incorporate different types of season extension in your vegetable garden. Warm season crops such as beans, cantaloupes, corn, cucumbers, eggplants, peppers, pumpkins, summer and winter squash, tomatoes, and watermelons will all need protection from frost at the beginning of the growing season. If you have the budget and space, a greenhouse is the best type of season extension. Other useful devices include high tunnels, low tunnels, cloches, cold frames, Wall O’ Water, and row cover (also called frost cloth).
If building a greenhouse or high tunnel, space structural supports no more than 4 feet apart to provide sufficient reinforcement for snow load. In any type of season-extension structure, galvanized steel will provide better structural support than PVC pipe. If purchasing polyethylene (clear plastic) to use as a protective covering, be sure to select greenhouse-grade (treated for UV resistance), not construction-grade plastic, because it will be much more durable. Greenhouse-grade plastic can be purchased at local garden centers and farm and garden supply stores.
Cold frames, another type of season extension, provide shelter for tender plants. They are usually rectangular in shape and built with a glass or plastic roof and a hinged cover that can be opened on warm days and closed on cool nights. The side walls are generally built with a wood frame or masonry blocks. Cold frames should be located in a southern exposure to maximize sunlight.
Floating row covers are made of spun polyester and are made in different thicknesses. They can increase air temperatures inside the cover to up to 6°F depending on thickness. Row cover can be used in a variety of ways and can cover many structures.
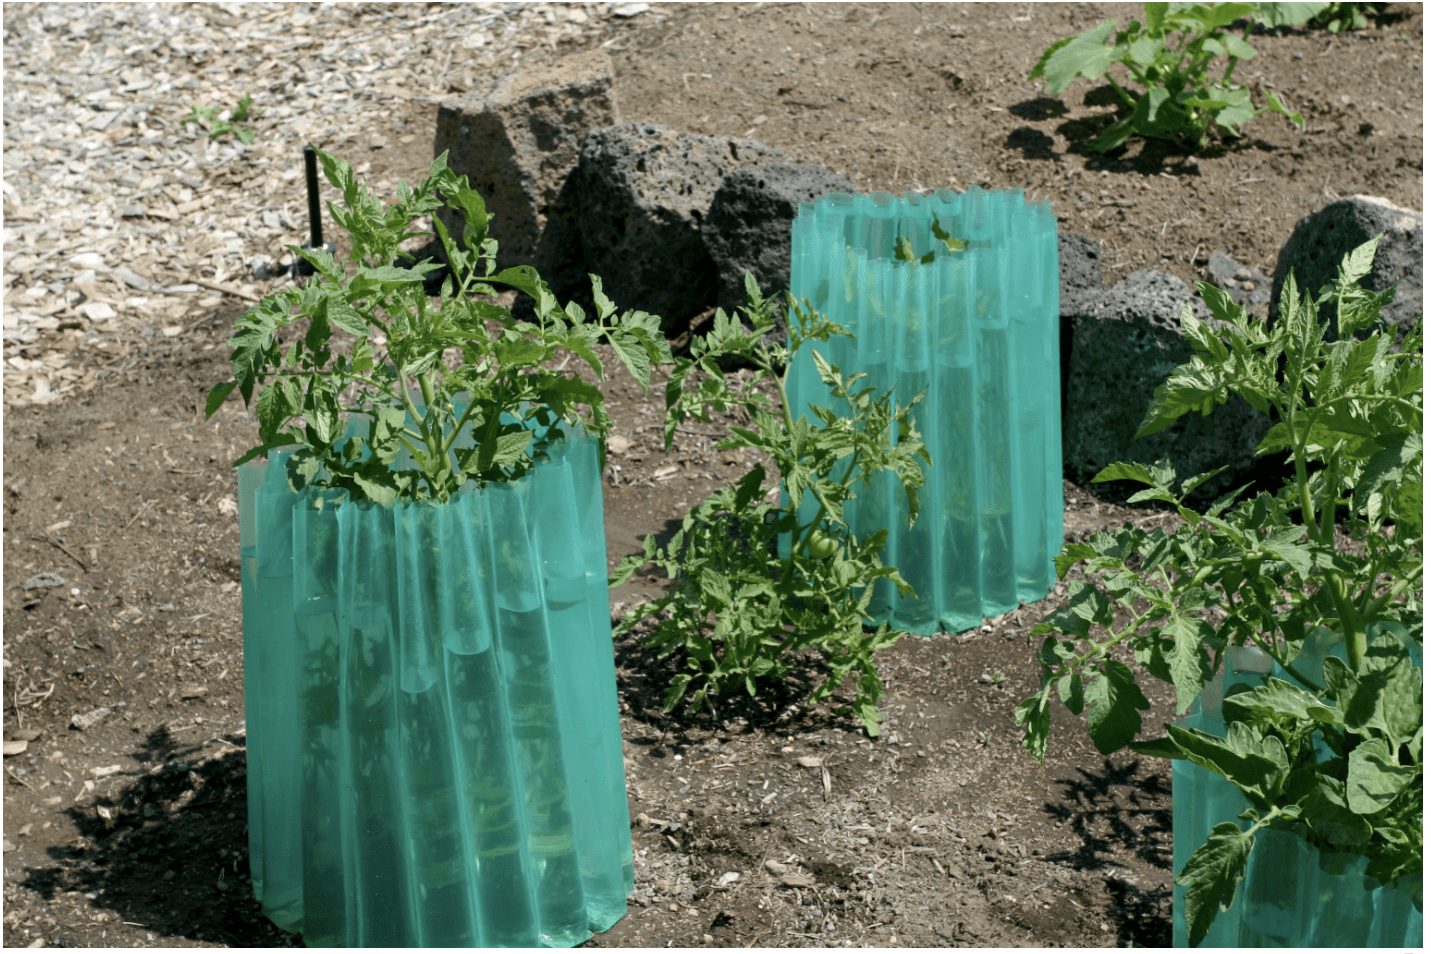
Wall O’ Water devices are vertical tubes filled with water that store heat during the day and release the heat out at night for an increased air temperature inside of the device. Rocks and retaining walls can also be used to absorb or store heat during the day and emit it back at night, serving as heat sinks to help extend the season.
Vegetables commonly grown in Central Oregon
The following is a list of some of the more common vegetables grown in Central Oregon. A variety of other crops can be grown here; just be sure to select short season varieties with a maturation date of 75 days or less for greatest success.
- Direct Seed – Place the seeds directly in the ground or planting area.
- Transplant – Place plant starts directly in the ground or planting area.
- Frost Tolerant – Describes plants that will not be damaged by a light frost.
- Frost Sensitive – Describes plants that will likely be damaged by a light frost.
Asparagus — Transplant • Frost Tolerant
Varieties: Jersey Giant, Mary Washington, Jersey Night, UC 157, Purple Passion
How to plant: Dig a trench 5 to 8 inches deep. Fill the trench with well-aged compost, mounding it more in the center up to 2 inches below the top of the trench. Apply triple superphosphate (0-46-0) along the center of the mound. Place the roots of the crowns on top of fertilizer (this will not burn the roots), spacing the crowns 12 to 18 inches apart. Cover the crowns with 2 more inches of amendment, bringing it to the level of the surrounding soil. Plant crowns in early June when soil temperatures are consistently 50°F or higher.
Hints: Provide a well-drained, solitary bed for asparagus that will not be disturbed; this crop is perennial and will come up each season.
Harvest: May to June. During the first two seasons, do not harvest asparagus because it weakens the plants and delays establishment. You can harvest a few spears during the third season for the first 3 weeks only. Starting with the fourth season, you can harvest asparagus for 6 to 8 weeks. Spears should be no thicker than your index finger and 5 to 7 inches long. A 12-foot row yields 8 pounds.
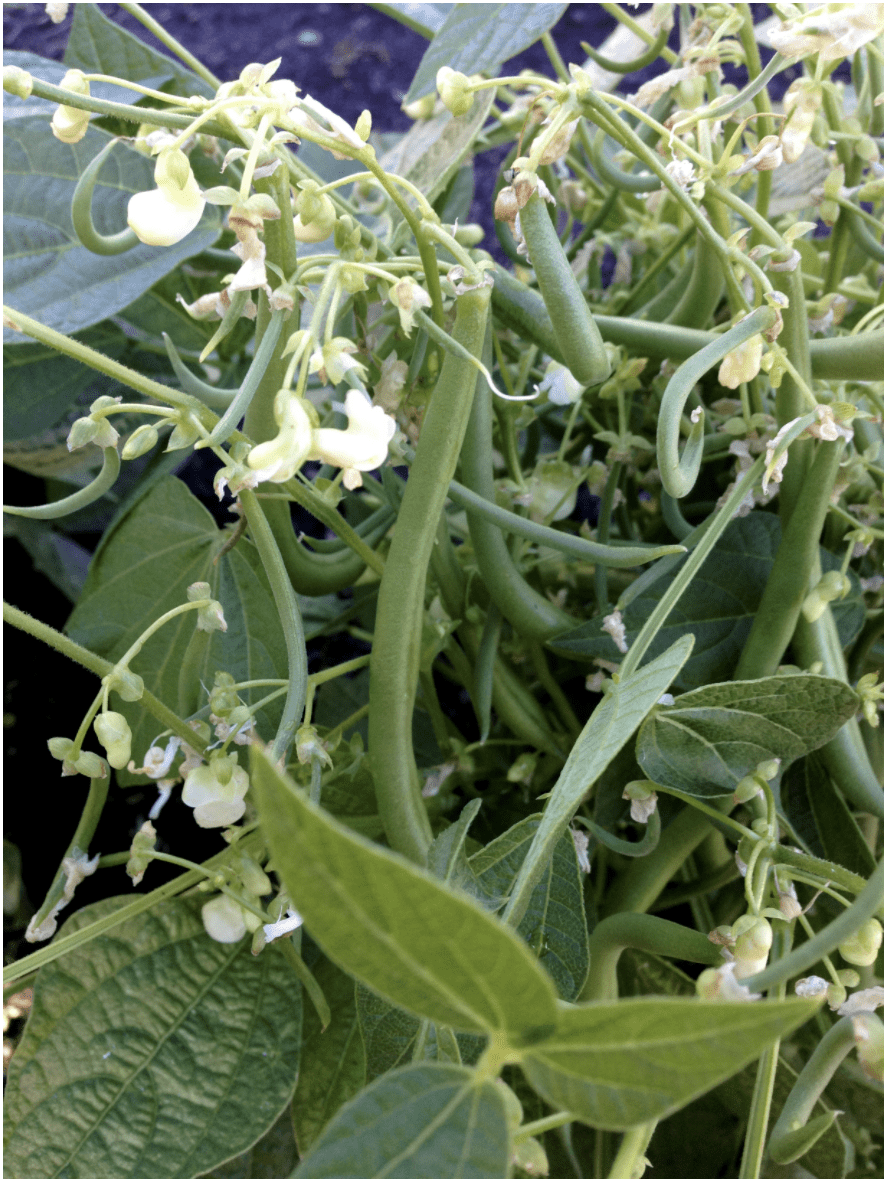
Beans — Direct Seed • Frost Sensitive
Varieties:
- Bush types (good for quick production): Tendercrop, Venture, Slenderette, Oregon Trail, Jade, Oregon 54
- Pole types (produce a longer season): Blue Lake, Kentucky Blue, Romano, Cascade Giant, Kentucky Wonder
- Wax bush types: Goldenrod, Goldrush, Indy Gold, Slenderwax
How to plant: Plant first week in June. Sow seeds 2 to 3 inches apart. Seeds germinate in 5 to 7 days. To extend the number of weeks that fresh beans are available, plant two or three successions, each 2 weeks apart.
Hints: Pregerminate beans in moist paper towels for better emergence.
Harvest: August to October. Allow 70 to 75 days to maturity. A 15-foot row yields 7 pounds over 3 to 4 weeks.
Beets — Direct Seed • Frost Tolerant
Varieties: Ruby Queen, Detroit Dark Red, Kestrel, Early Wonder, Red Cloud, Cylindra (carrot-like), Golden, Early Wonder Tall Top (green)
How to plant: Plant mid-April to mid-May and again in August. Thin plants to 2 to 3 inches apart.
Hints: Provide even and consistent watering to avoid having tough, fibrous beets.
Harvest: Mid-July and October. Allow 70 to 75 days to maturity. A 25-foot row yields 20 pounds.
Bok Choy (Pak Choi) — Direct Seed • Frost Tolerant
Varieties: Mei Qing Choy, Joi Choi
How to plant: Plant in mid-May to early June and again in late summer. Sow seeds 1 to 2 inches apart. Thin to 6 to 12 inches apart. Can also start from seed indoors and transplant in June.
Hints: Once these plants show signs of bolting or flowering, the leaves become less palatable.
Harvest: Allow 4 to 6 weeks to maturity. Can eat the leaves, stems, and flowering shoots of the plant. Use fresh or in stir-fry.
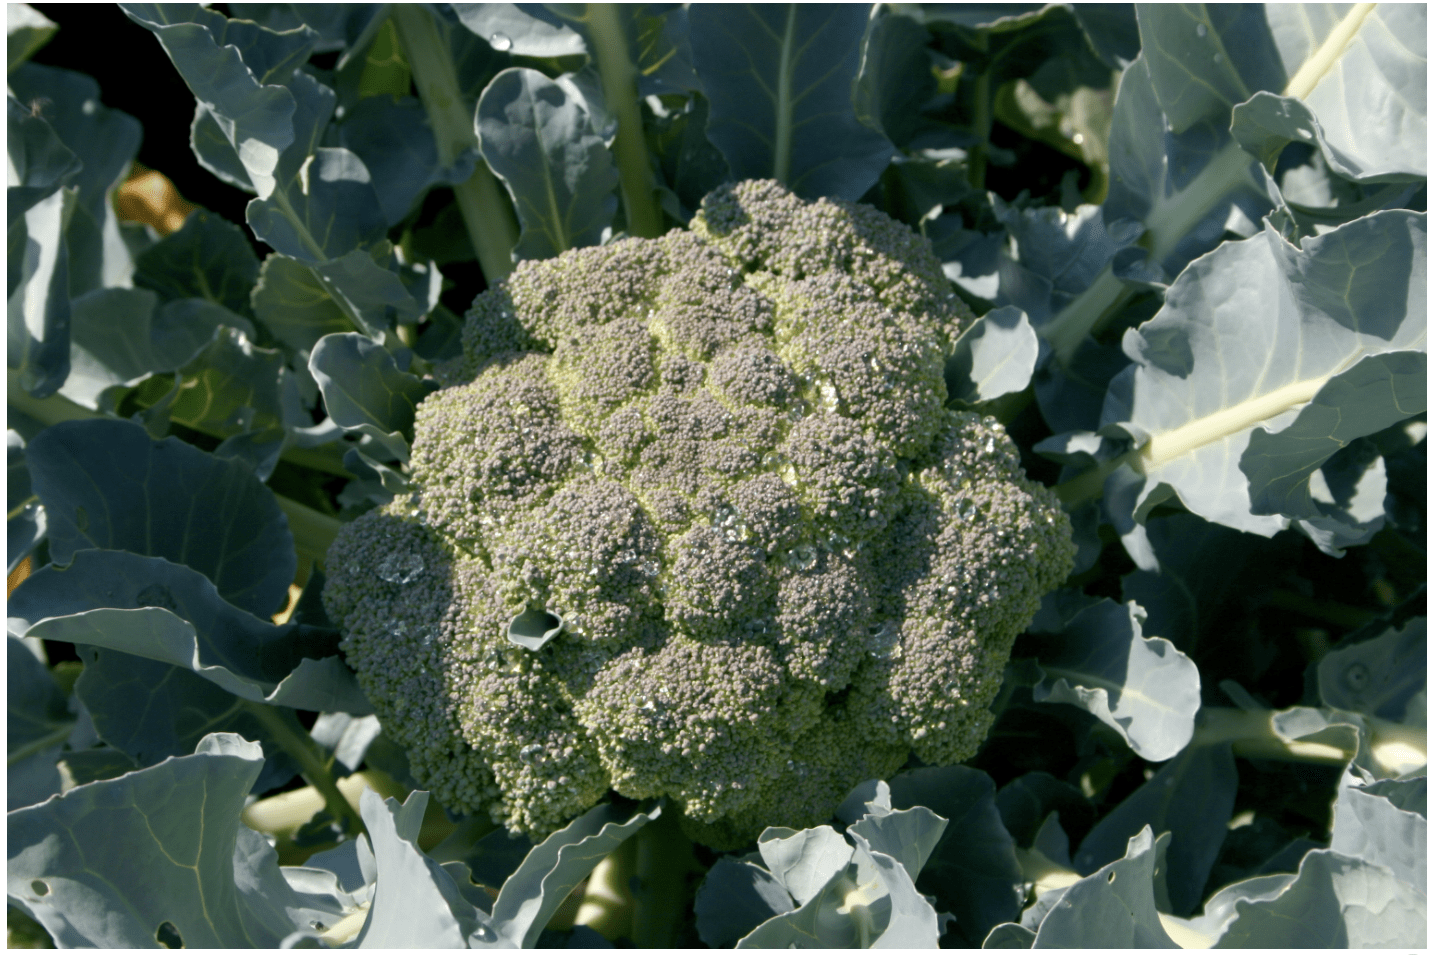
Broccoli — Transplant • Frost Tolerant
Varieties: Packman, Premium Crop, Arcadia, Windsor, Gypsy, Early Dividend
How to plant: Transplant 4- to 6-week-old plants from mid-April to mid-May and again in August. Space plants 9 to 12 inches apart.
Hints: Cover with a floating row cover from time of planting until harvest to protect from cabbageworm or cabbage looper.
Harvest: Allow 65 to 70 days to maturity. A 100-square-foot area yields 25 pounds.
Brussels Sprouts — Transplant • Frost Tolerant
Varieties: Jade Cross “E” Hybrid
How to plant: Transplant in early May to mid-June. Space plants 16 to 18 inches apart in rows 36 inches apart.
Hints: Cover with a floating row cover from time of planting until harvest to protect from cabbageworm or cabbage looper.
Harvest: This crop is very cold tolerant and can be harvested in late fall to early winter. Sprouts mature from the bottom of the plant up. Remove sprouts when they reach 1 inch across in size from the bottom of the plant up. A 100-square-foot area yields 30 pounds.
Cabbage — Transplant • Frost Tolerant
Varieties:
- Early: Parel, Primax, Farao, Tendersweet, Gonzales
- Midseason: Golden Acre, Bravo, Charmant, Cambria, Invento
- Red: Ruby Perfection and Red Acre
- Savoy: Melissa, Famosa
How to plant: Transplant 6- to 8-week-old plants in late May. Space plants 12 to 18 inches apart.

Hints: Cover with a floating row cover from time of planting until harvest to protect from cabbageworm or cabbage looper.
Harvest: Allow 90 to 95 days to maturity. A 9-foot row yields 20 pounds.
Carrots — Direct Seed • Frost Tolerant
Varieties:
- Orange: Red Core Chantenay, Royal Chantenay, Scarlet Nantes, Bolero, Mokum, Napa, Danvers
- Yellow: Yellowstone
- White: White Satin
- Purple: Purple Haze
- Mini: Thumbelina, Parmex
- and many others
How to plant: Broadcast seeds in mid-April and every 2 weeks through early June.
Hints: Thin to 1 to 2 inches apart. For a late season crop, plant a whole bed of tightly spaced carrots, then mulch heavily. Carrots can be stored in the ground until there is a threat of the soil freezing. Do not overwater a late-season crop.
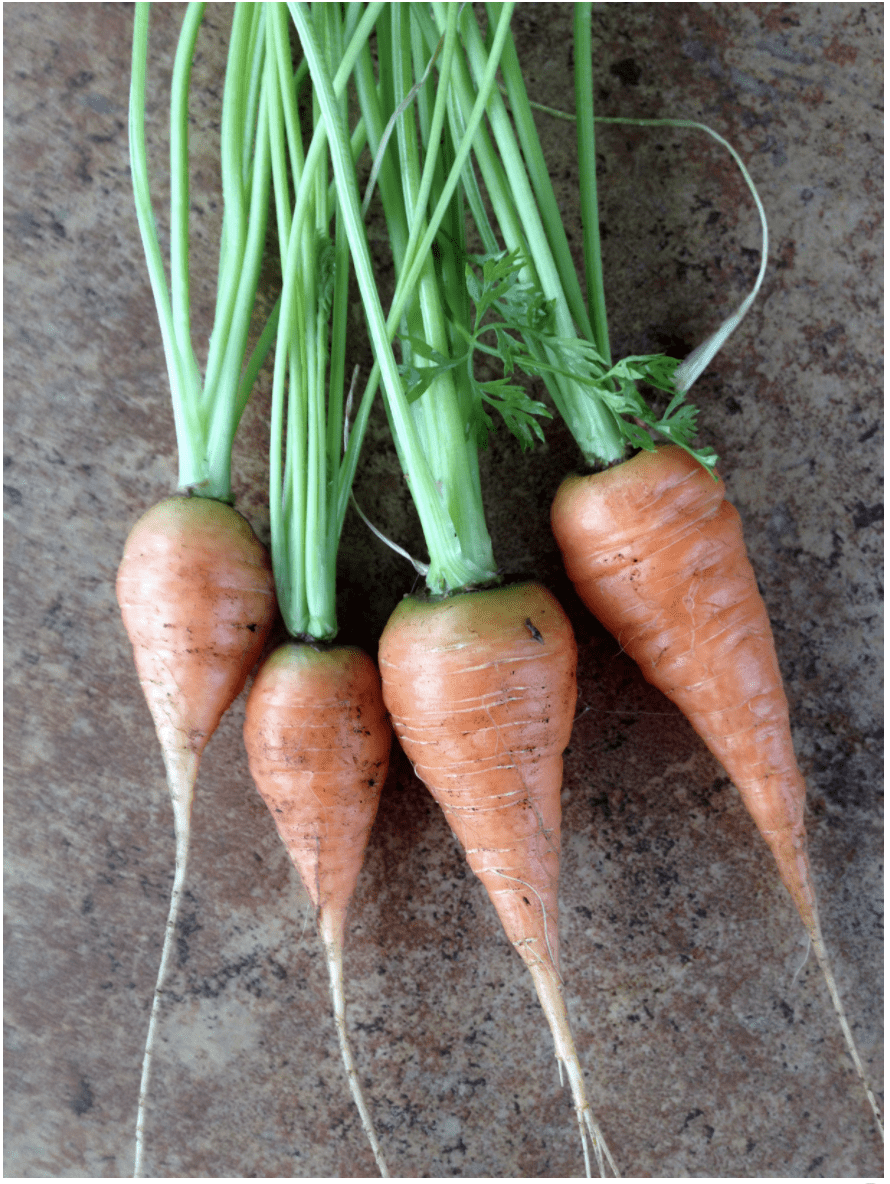
Harvest: Allow 65 to 85 days to maturity. Can be harvested into late fall and early winter. A 15-foot row yields 8 pounds.
Cantaloupes — Transplant • Frost Sensitive
Varieties: EarliChamp, Minnesota Midget, Sweet Granite
How to plant: Transplant 2- to 4-week-old plants in early June. Place plants in rocky areas for added heat retention. Space plants 24 to 36 inches apart.
Hints: May not work at higher elevations over 4,000 feet. Use short-season, bush, or low-vine varieties. Provide a protected area and row covers, cloches, or cold frames throughout the season. Let the first two or three fruits set, and then pick off the remaining fruit, so all of the energy will go into the first fruits.
Harvest: Melons are ripe when they separate easily from the vine. Yield varies.
Cauliflower — Transplant • Frost Tolerant
Varieties: Snow Crown, Candid Charm, Apex, Amazing, Graffiti (purple), Panther (green)
How to plant: Transplant 6- to 8-week-old plants early May to early June. Space plants 15 to 18 inches apart.
Hints: Cover with a floating row cover from time of planting until harvest to protect from cabbageworm or cabbage looper. As the head develops, cover it by pulling wrapper leaves together and keeping them closed with a clip to prevent discoloration from sun exposure.
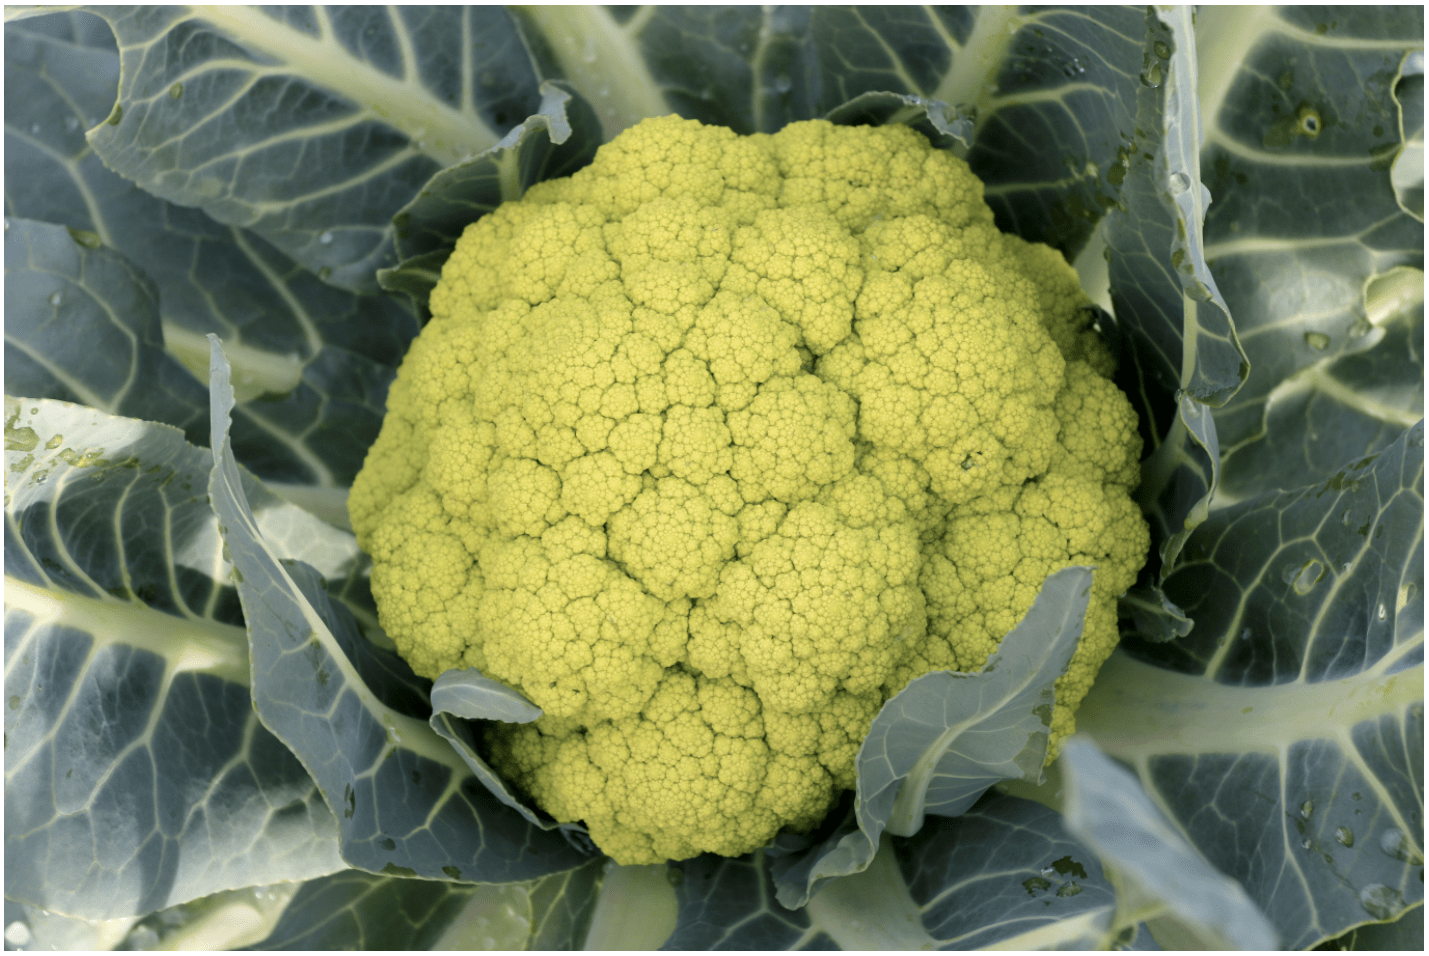
Harvest: Allow 50 to 80 days from transplanting to maturity. Harvest the head when it is compact and white. A 100-square-foot area yields 35 pounds.
Chard — Direct Seed • Frost Tolerant
Varieties: Bright Lights, Fordhook Giant, Rhubarb Red, Bright Yellow, Silverado, Broadstem Green
How to plant: Plant early May through June. Sow seeds 6 to 9 inches apart.
Harvest: Allow 55 to 70 days to maturity. Begin harvesting when leaves are 7 to 9 inches long. An 8-foot row yields 7 pounds.

Corn, sweet — Direct Seed • Frost Sensitive
Varieties:
Yellow kernels
- Standard sweetness (early): Sundance, Early Sunglow, Seneca Horizon, Jubilee (main season)
- Sugary enhanced: Sugar Buns (very early), Precocious (early), Spring Treat (early)
- Sugary enhanced (main season): Incredible, Kandy King, Legend, Bodacious
White kernels (must be isolated from yellow or bicolor to get all white)
- SuperSweet (main season): Xtratender 272A, Mirai 308BC
- Sugary enhanced (early): Trinity, Fleet
- Sugary enhanced (main season): Whiteout, Silver Princess
How to plant: Plant mid-May to early June at elevations below 3,500 feet. Plant early varieties (70 days to maturity) in 2-week intervals. Sow seeds 16 inches apart in rows 24 inches apart. Plant heavily. Always plant in blocks of rows rather than a single row for more successful pollination. Isolate different types of sweet corn to minimize cross-pollination.
Hints: Thin plants to 16 inches apart.
Harvest: Pick when the silks turn brown and if the kernels produce a milky substance when pierced. 25 feet of row yields 40 ears over a 2-week period.
Cucumbers — Transplant • Frost Sensitive
Varieties:
- Slicing: Burpee Hybrid, Marketmore 86 & 97,Poinsett, Raider, Dasher II, Slicemaster, Intimidator, Tasty Green, Orient Express, Genuine, Sweet Marketmore, Tasty Jade
- Pickling: SMR 18, Pioneer, Bush Pickle, County Fair, Clinton, Cool Breeze, Regal, Vertina
- Novelty: Armenian, Lemon
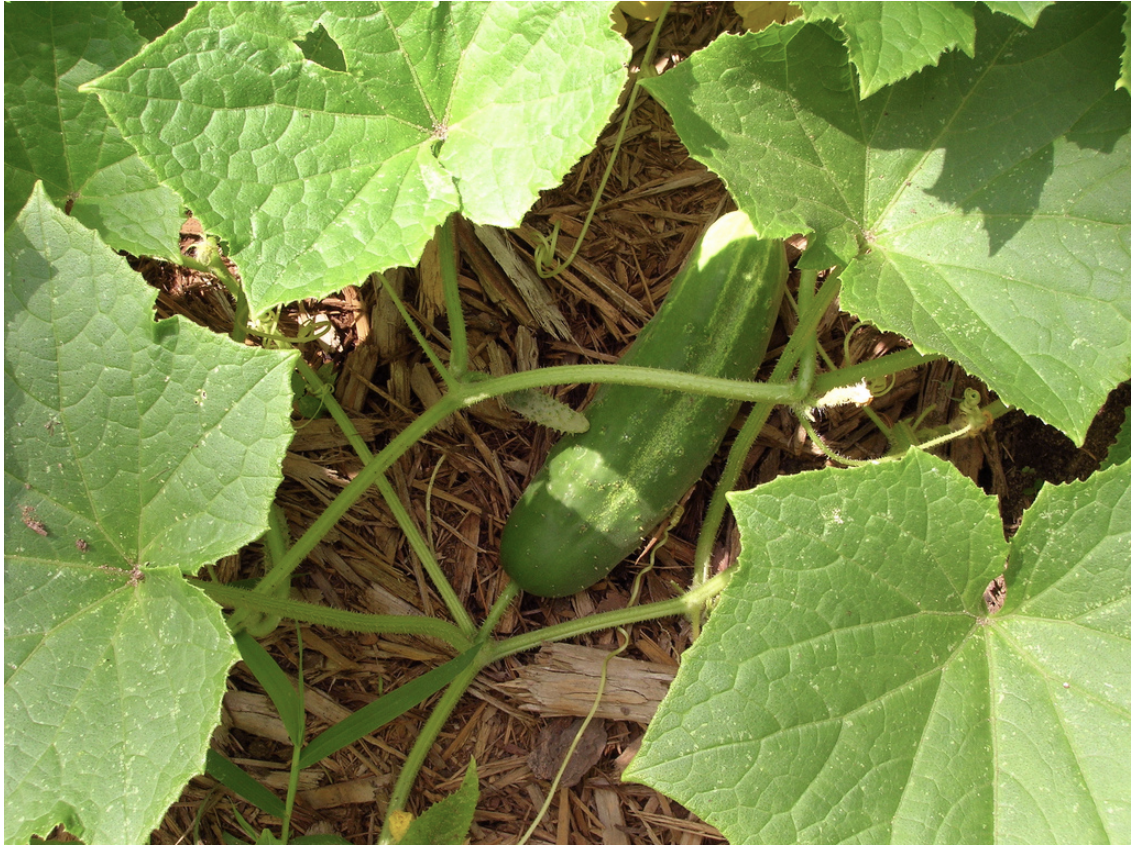
How to plant: Start seeds indoors in early May and transplant the first week in June. Space plants 18 to 36 inches apart.
Hints: Cucumbers need warm temperatures and plenty of water to be successful. Keep nighttime temperatures as warm as possible. Plant in protected areas and use a row cover or surround the plants with rocks for increased heat.
Harvest: Allow 55 to 65 days from transplanting to maturity. Continuous picking will increase harvest times. A 10-foot row yields 20 pounds over 6 weeks.
Eggplants — Transplant • Frost Sensitive
Varieties: Bride, Dusky, Ichiban, Hansel, Fairy Tale, Ophelia, Michal, Patio Baby, Farmer’s Purple Long
How to plant: Start seeds indoors 8 to 10 weeks ahead of time and transplant the first week in June. Space plants 18 to 24 inches apart.
Hints: Select miniature or smaller eggplant varieties. Provide protected area. Walls O Water® works well for protecting tender eggplants.
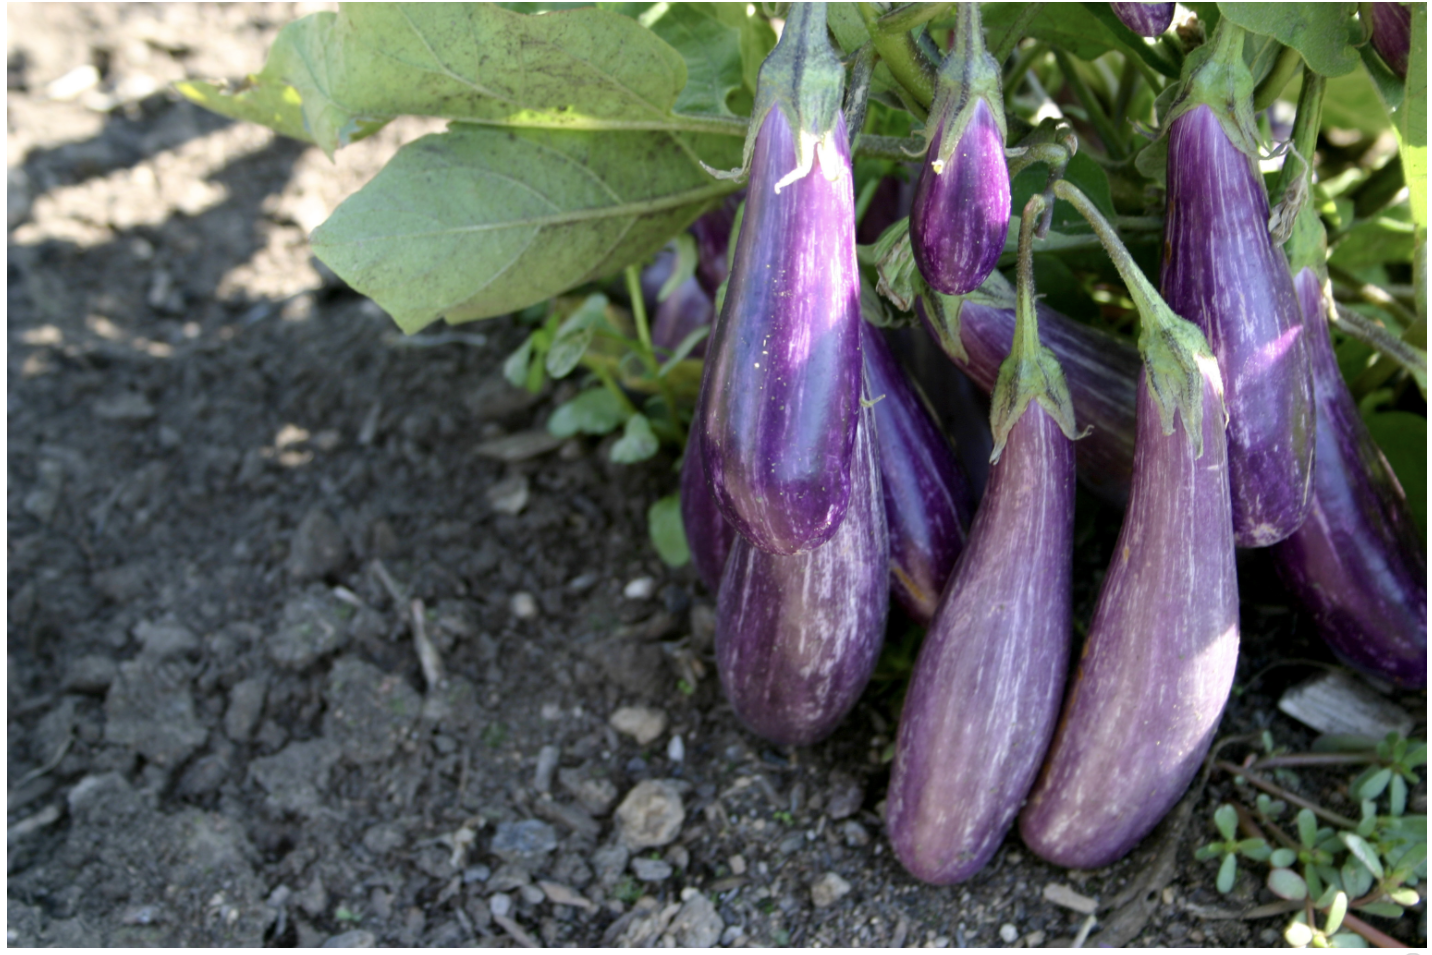
Harvest: Allow 60 to 70 days to maturity. Pick eggplants as soon as they reach usable size, when skins still are shiny. A 10-foot row yields 15 pounds.
Garlic — Bulbs • Frost Tolerant
Varieties:
- Softnecks (longer storage): Inchelium red, Silver Rose
- Hardnecks (cold hardy): Spanish Roja, German Porcelain, Korean Red, Killarney
- Other: Elephant Garlic
How to plant: Plant garlic cloves in the fall 2 to 3 inches deep with the tip of the clove pointing up. Space bulbs 12 inches apart.
Hints: Plant in October to November.
Harvest: Allow 90 to 100 days to maturity. Garlic is ready when about two thirds of the foliage (tops) begins to dry out or turn yellow. After removing them from the soil, tie tops together and hang in a cool, dry place for 2 weeks. Garlic is then ready for storage. A 100-square-foot area yields 25 pounds.
Kale — Direct Seed or Transplant • Very Frost Tolerant
Varieties: Siberian, Nero di Toscana, Dwarf Blue Curled Scotch, Redbor, Winterbor, Red Ursa
How to plant: Sow seeds in mid-April to early May and again in late summer. Thin seedlings to 12 to 18 inches apart. Transplant plants 12 to 18 inches apart in June.
Hints: Cover with a floating row cover from time of planting until harvest to protect from cabbageworm or cabbage looper.
Harvest: Allow 55 to 65 days to maturity. Pick younger leaves when 4 to 6 inches long for use in salads. Older leaves can be cooked.
Kohlrabi — Direct Seed or Transplant • Frost Tolerant
Varieties: Early White Vienna, Early Purple Vienna, Kongo, Kolibra, Eder
How to plant: Sow seeds when soil temperatures are above 50°F. Thin seedling to 4 to 6 inches apart with 12 inches between rows. Transplant 6- to 8-week-old plants early May to mid-June. Space plants 4 to 6 inches apart in rows.
Hints: Cover with a floating row cover from time of planting to harvest to protect from cabbageworm or cabbage looper.
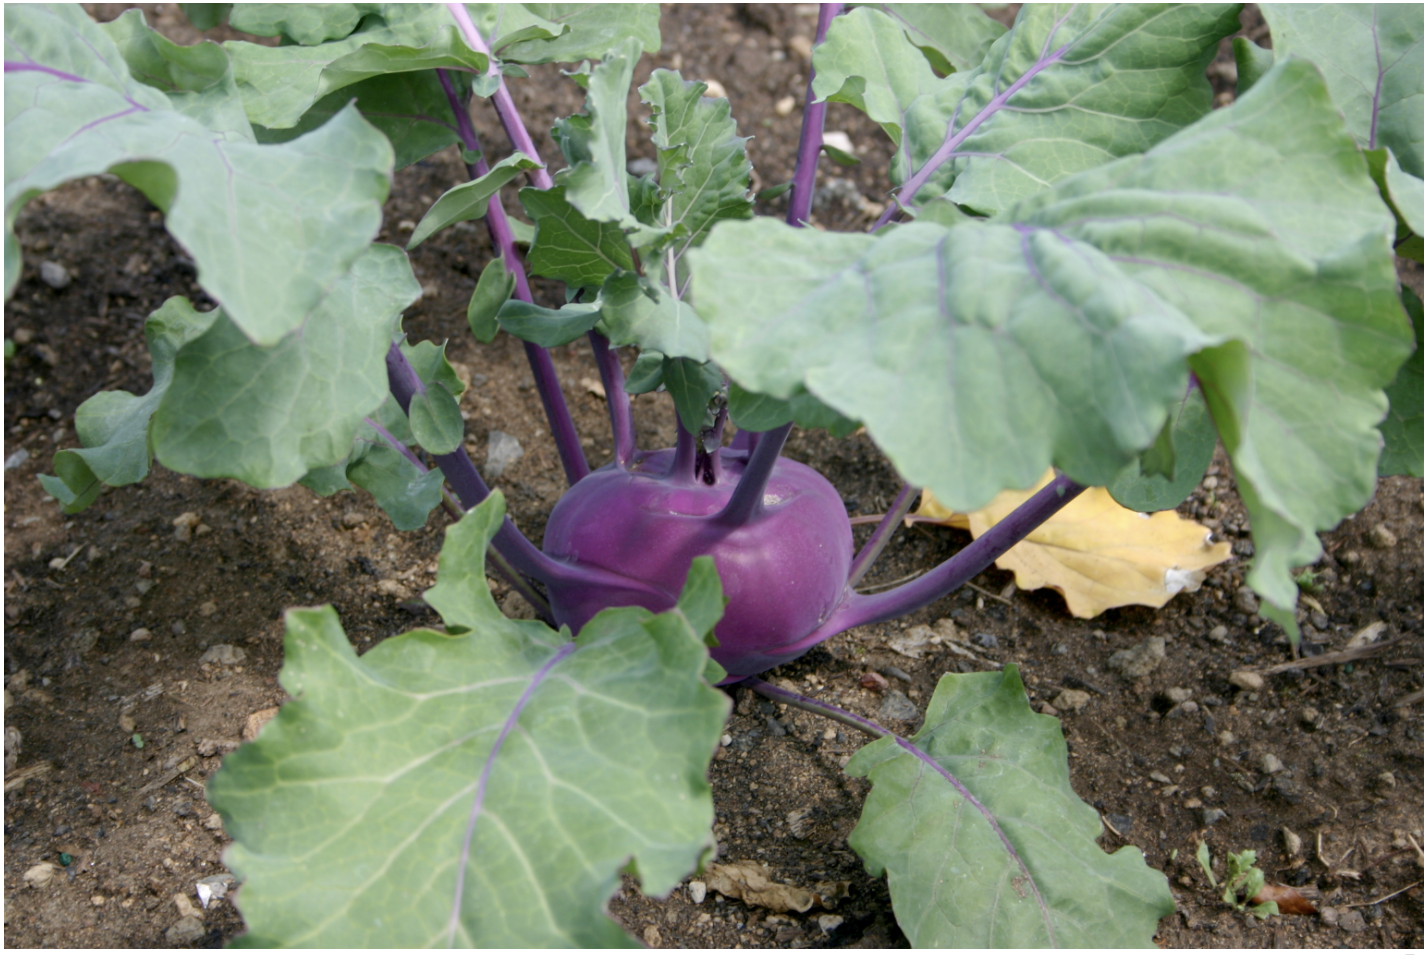
Harvest: Allow 60 days from transplanting to maturity. Harvest when bulbs are 2 to 3 inches in diameter. A 12-foot row yields 24 plants.
Leeks — Transplant • Frost Tolerant
Varieties: King Richard (early—79 days to maturity), American Flag, Kilima
How to plant: Transplant 4- to 6-week-old plants after last frost. Space plants 2 to 6 inches apart.
Harvest: Allow 90 or more days from transplanting to maturity. Leeks can be harvested after the stem diameter exceeds 1 inch in size and is more than 3 inches long. A 10-foot row yields about 30 plants.
Lettuce — Direct Seed • Frost Tolerant
Varieties:
- Red leaf: Prizehead, Red Sails, Redina, New Red Fire, Merlot, Red Tide
- Green leaf: Salad Bowl, Grand Rapids, Slobolt, Pom Pom
- Oak leaf: Oaky Red Splash, Cocarde, Mascara, Blade
- Romaine: Paris Island, Valmaine, Green Towers, Outredgeous, Devils Tongue, Little Gem, Freckles
- Bibb type: Optima, Buttercrunch
- Batavian: Nevada, Sierra
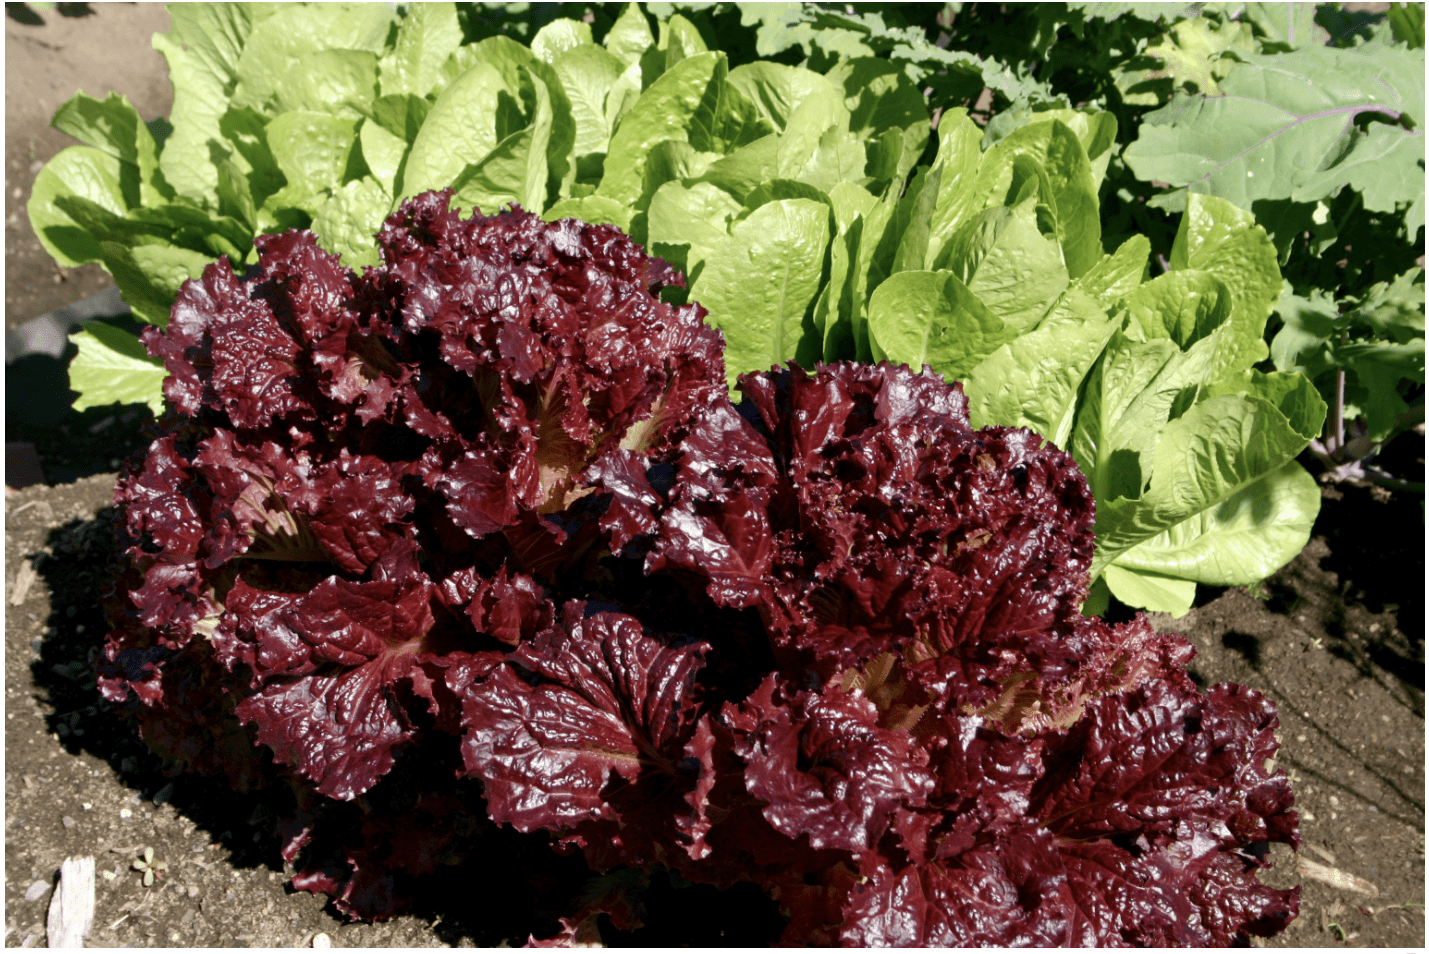
Other salad greens that can also be directly seeded include mustard greens, endive, frisée, arugula, raddichio (Red chicory), and Chinese cabbage.
How to plant: Plant mid-April to early June. Sow seeds 6 to 9 inches apart. Can seed a second crop in late summer.
Hints: To delay bolting, keep plants cool by planting in shady areas or by using heavy row cover as a shade cloth in hot weather.
Harvest: Outer leaves may be harvested early. Allow 45 to 55 days to maturity. A 15-foot row yields 10 pounds over a 2-week period.
Onions — Transplant sets (bulbs)/plants • Frost Tolerant
Varieties:
- Yellow bulbs: Copra, Prince, First Edition, New York Early, Candy
- Red bulbs: Redwing, Mars
- White bulbs: White Sweet Spanish, Superstar
- Overwintering bulbs: Walla Walla Sweet
- Green bunching: Ishikura, Tokyo Long White, He-shi-ko
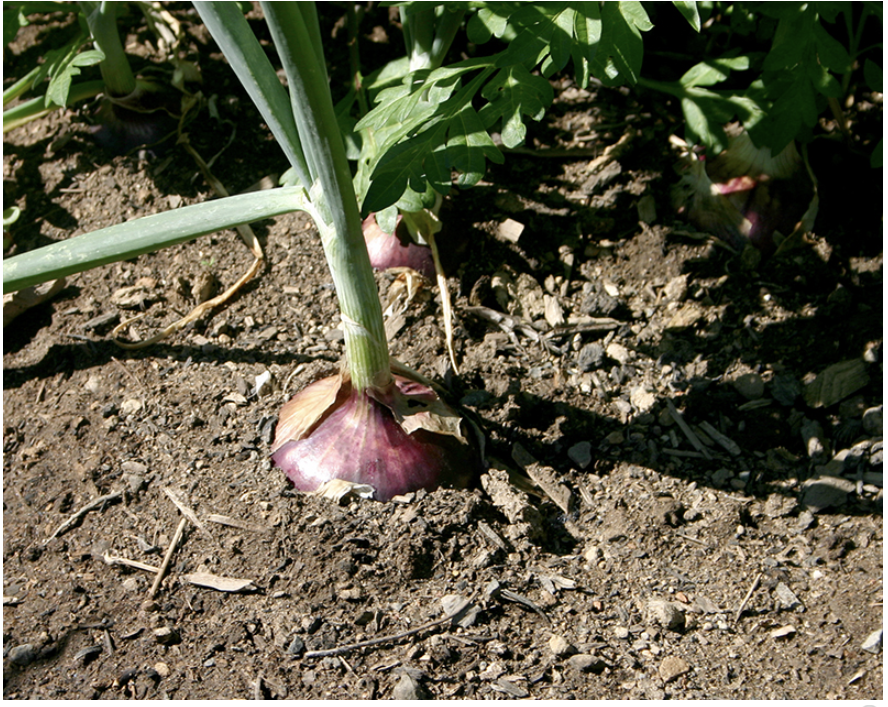
How to plant: Transplant sets or plants directly into the ground in mid-April to the first week in June. Space bunching onions 2 to 3 inches apart, bulbing onions 4 to 6 inches apart.
Hints: You can purchase onion sets (commercially produced baby onions) from local nurseries, seed catalogs, or farm and garden supply companies. It is easier to grow onions from sets than from actual seeds. You can plant bulbs thickly and then harvest green onions to thin the plants so that bulbs can develop.
Harvest: Allow 90 to 100 days after transplanting to maturity. A 10-foot row yields 10 pounds over 3 weeks.
Parsnips — Direct Seed • Frost Tolerant
Varieties: Harris Model, All America, Hollow Crown, Gladiator, Andover, Cobham Improved Marrow, Javelin
How to plant: Plant mid-April to May. Sow in a thin line and thin to 4 inches.
Hints: Can be grown at lower elevations. Do not allow the soil to dry out or the roots will split. Generally do not need fertilizer.
Harvest: Allow 125 days to maturity; will be a late fall harvest. A 10-foot row yields 7 pounds.
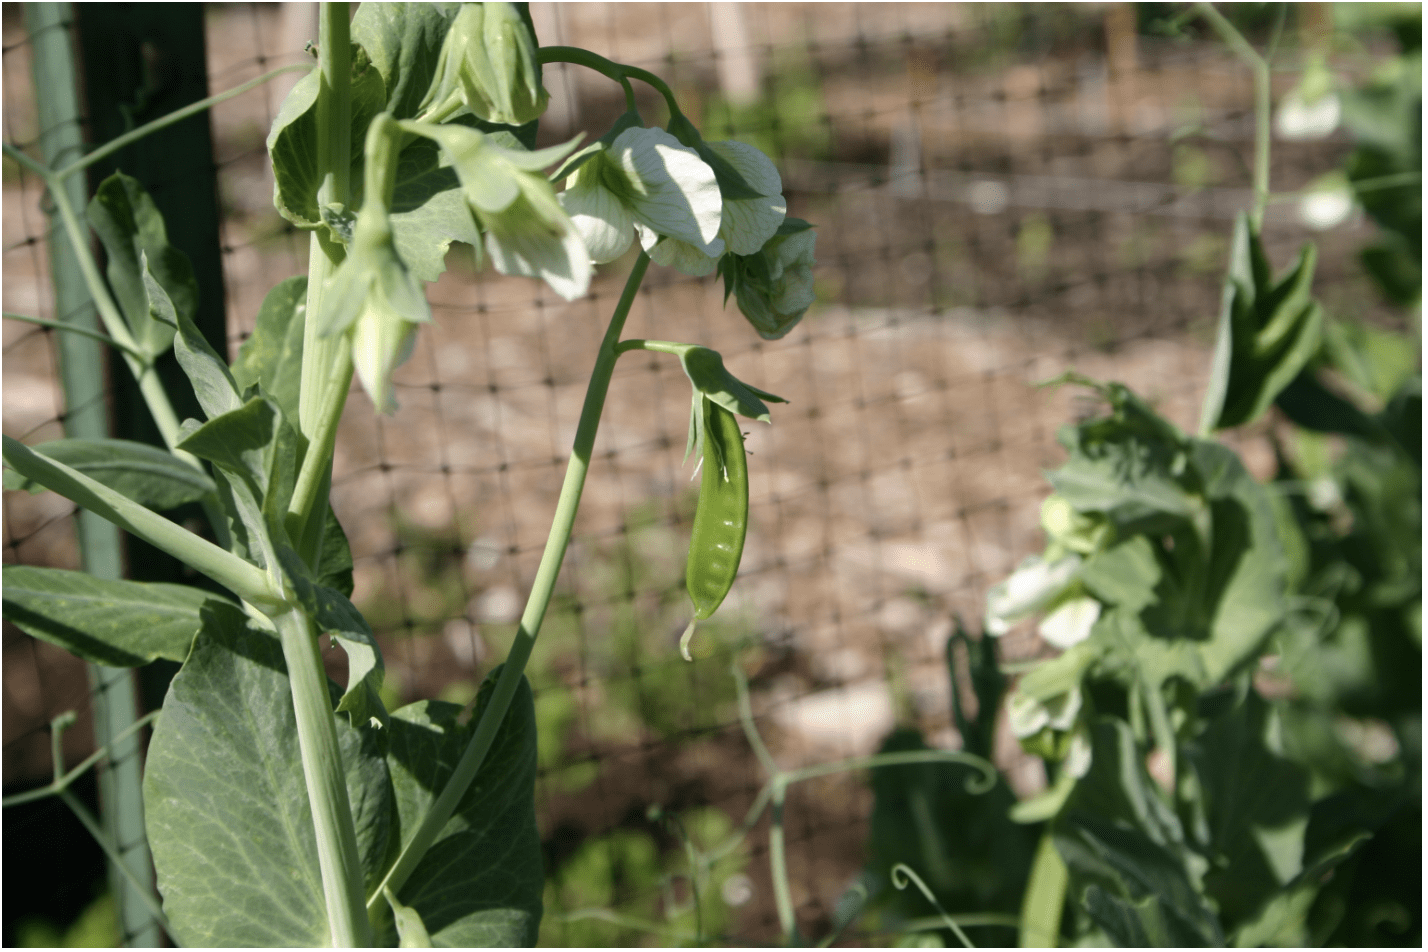
Peas — Direct Seed • Frost Tolerant
Varieties:
- Shelling: Novella II, Oregon Trail, Oregon Pioneer, Maxigolt
- Snow Peas: Oregon Sugar Pod II, Oregon Giant
- Snap Pea (bush): Sugar Daddy, Super Snappy, Cascadia, Sugar Sprint, Sugar Ann
- Snap Pea (pole): Sugar Snap or Super Sugar Snap (virus susceptible; plant early)
How to plant: Plant late April to late May or as early as soil can be worked. Broadcast seeds and thin to 2 to 6 inches apart.
Hints: Peas tolerate frost, but plants decline during hot weather. Short bush types normally are shorter season peas and are highly recommended. You can eat the entire pod of snow and sugar (snap) peas.
Harvest: Allow 59 to 70 days to maturity. A 15-foot row yields 3 to 5 pounds per week depending on weather.
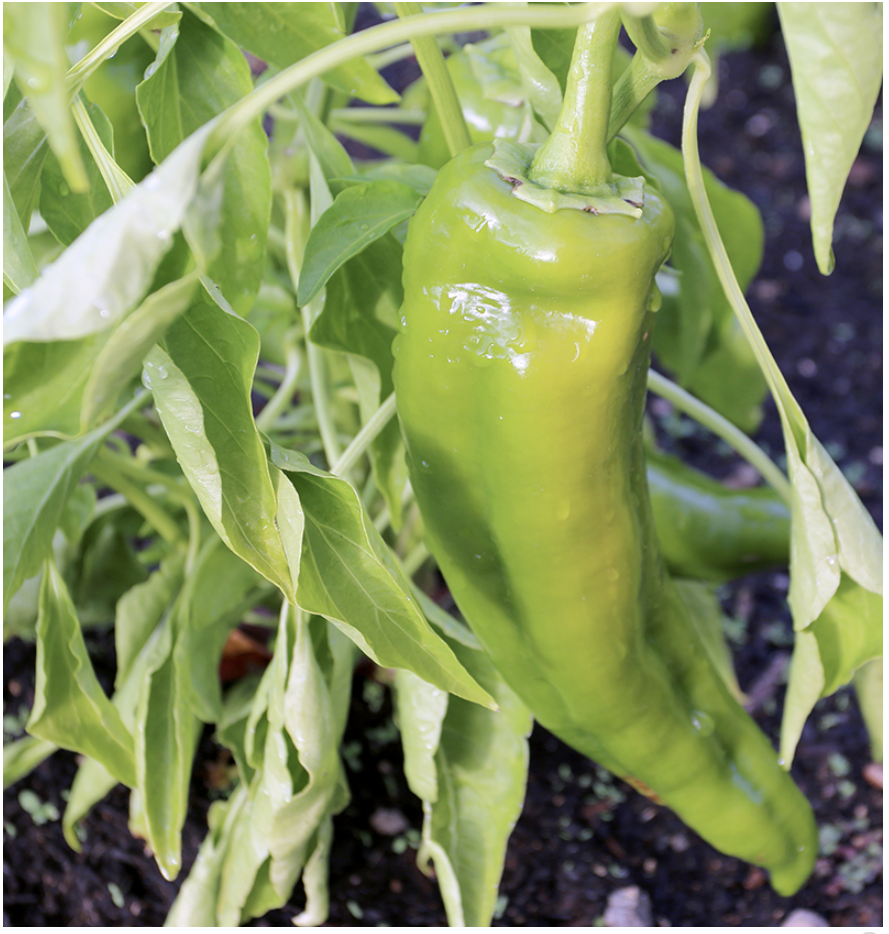
Peppers — Transplant • Frost Sensitive
Varieties:
Sweet Bell
- Green to red: Ace, Yankee Bell, Lady Bell, King Arthur, Lantern
- Green to yellow: Golden Bell, Golden Summer
- Green to orange: Ariane, Mandarin
- Green to purple: Lilac Bell, Purple Beauty
- Green to lavender to red: Islander
- Green to chocolate brown: Hershey
- Ivory to red: Ivory
Other types
- Specialty sweet types: Sweet Banana, Biscayne, Lipstick, Round of Hungary, Carmen
- Cayenne: Cayenne Long Slim
- Jalapeño: Early Jalapeño, Conchos
- Specialty hot types: Serrano, Bulgarian Carrot
How to plant: Plant seeds indoors mid-March. Transplant late May to early June with frost protection in place. Space plants 12 to 15 inches apart.
Hints: Peppers do not tolerate frost and need nighttime temperatures of at least 50°F for pollination to occur. Use Wall O’ Water®, floating row covers, or other protection.
Harvest: Allow 65 to 75 days from transplanting to maturity. Yield varies widely.
Potatoes — Seed Pieces • Partially Frost Tolerant
Varieties:
- White: Russet Burbank, Kennebec
- Yellow: Yukon Gold
- Red: Red Pontiac, Norland
- Purple: Viking Purple
How to plant: Potato seeds are really tubers and not true seeds. You purchase them as sets and the tubers are whole. Always use certified disease-free seed. The ideal tuber or seed piece is 1.5 to 2.5 ounces. Plant seed pieces late April to late May. Space seed pieces 12 to 15 inches apart. For details on how to cut seed pieces, see “Potato Handling, Cutting, and Sanitation.”
Hints: Overfertile or dry soil can increase the occurrence of scab (a plant disease) on potatoes. Do not overamend soil in potato beds.
Harvest: Begin harvest anytime tubers reach edible size. Harvest as needed until late October. White russet potato varieties store better than red or yellow varieties. A 10-foot row yields about 15 pounds.
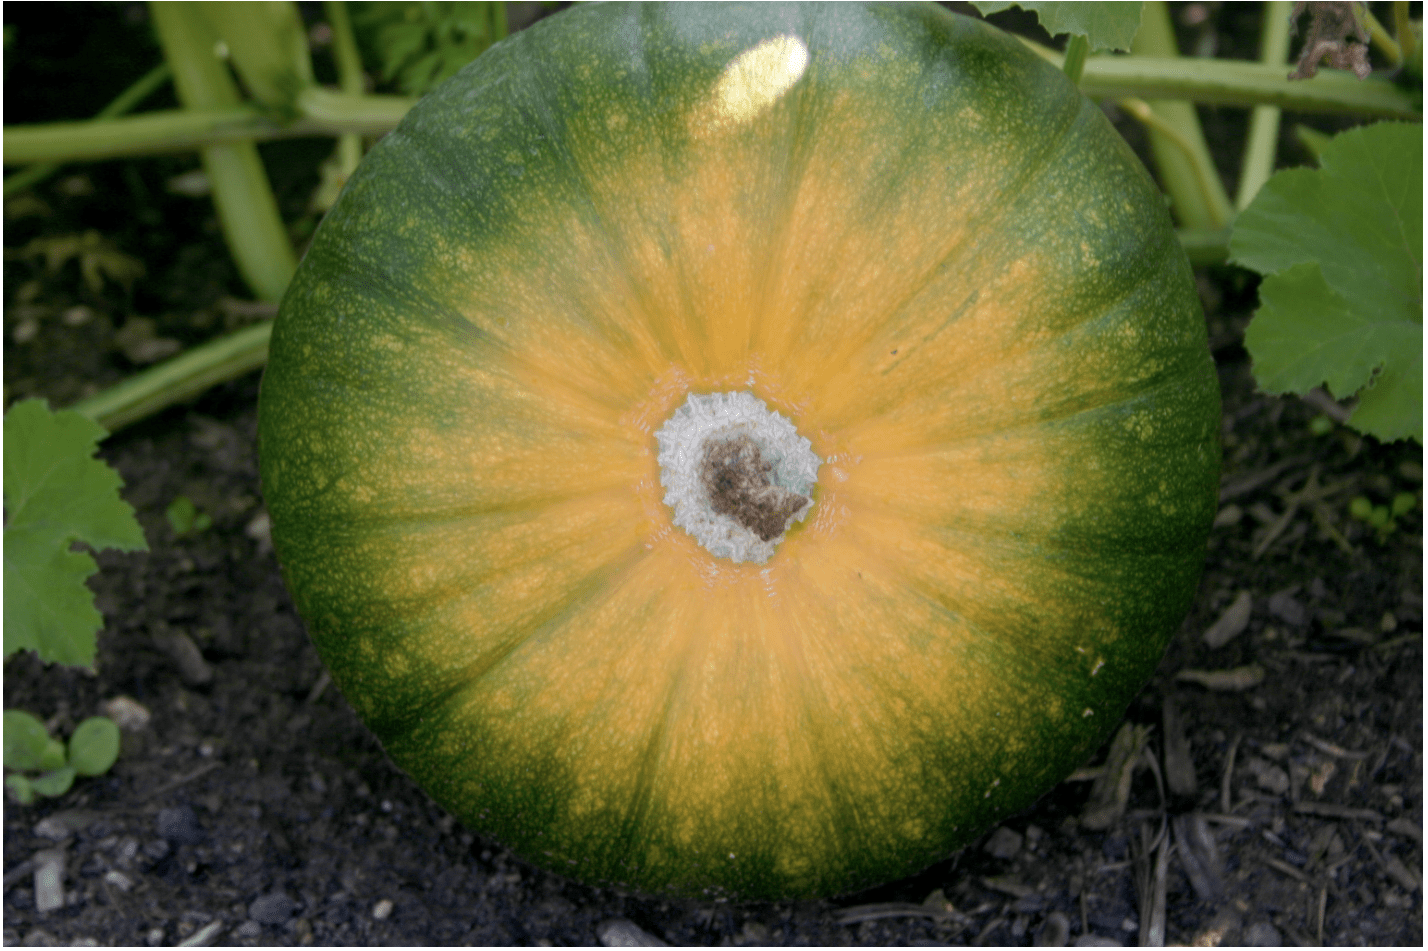
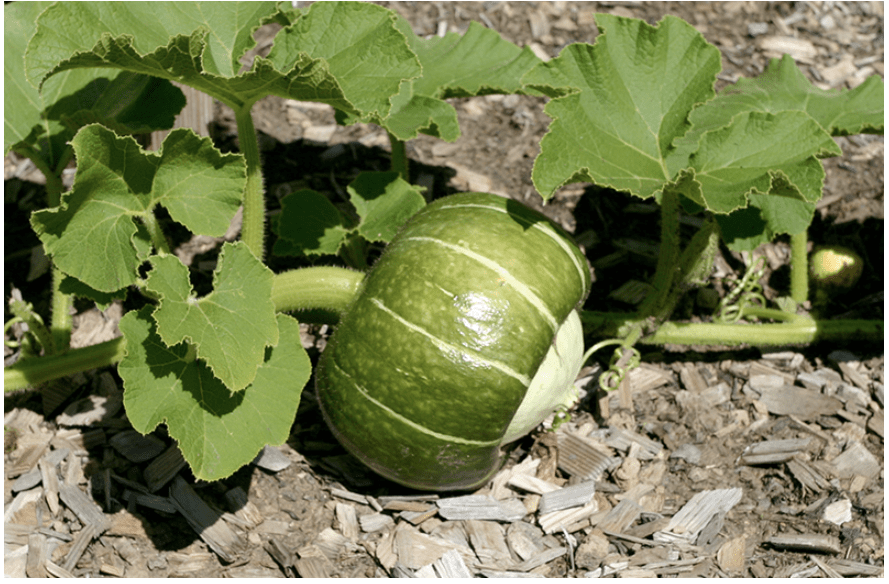
Pumpkins — Transplant • Frost Sensitive
Varieties:
- Medium size: Cinderella, Rock Star, Hijinks
- Small: Small Sugar (also called Small Sugar Pie), Orange Smoothie
- Compact vines: Oz, Spirit
- Hulless-seeded types: Baby Bear
- Mini ornamental types: Jack Be Little, Wee-Be-Little, Baby Boo
How to plant: Plant seeds indoors in early May. Transplant June 1. Plant one to two plants in a hill (mounded-up soil). Hills will warm earlier in the season. Space hills 36 to 72 inches apart.
Hints: Pumpkins do better at elevations below 3,500 feet. Try bush varieties or those that weigh 7 pounds or less at maturity. Larger pumpkins may not reach maturity. Temperatures above 90°F for several days in a row may cause flower buds to abort or slow down pollen tube growth and prevent fertilization, which can reduce fruit set. Consider hand pollination to increase yield.
Harvest: Allow 90 days to maturity for short-season varieties. Yield varies.
Radishes — Direct Seed • Frost Tolerant
Varieties:
- Red: Fuego, Comet, French Breakfast, Cherry Belle, Champion, Cherriette, Crunchy Royale, Pink Beauty
- White: Burpee White, White Icicle
- Large Japanese Type: Sakurajima Mammoth
How to plant: Plant small areas 10 days apart from mid-April through mid-June. Sow seeds 2 to 3 inches apart. Plant again starting mid-August through mid-September for a fall crop.
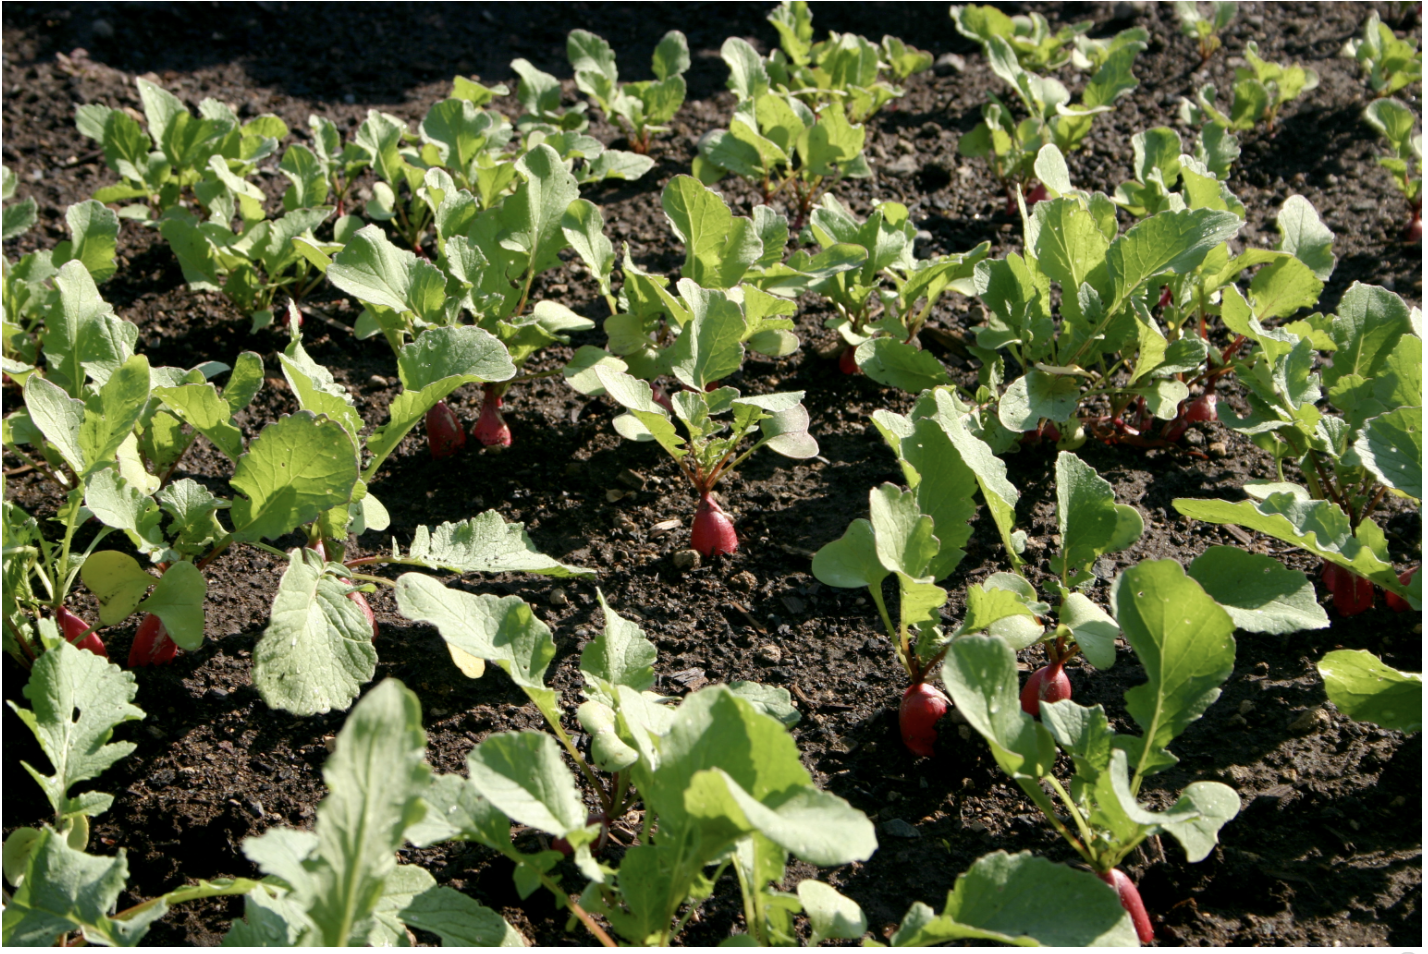
Hints: May need to cover with a floating row cover from time of planting until harvest to protect from maggots.
Harvest: Use radishes as soon as the root is large enough and do not allow them to over mature; they are usually ready in 20 to 30 days. A 12-foot row yields about 6 pounds in about 3 weeks.
Rhubarb — Transplant • Frost Tolerant
Varieties: Victoria, Chipman’s Canada Red, Crimson Red, Glaskins Perpetual
How to plant: Rhubarb, not typically grown from seed, is purchased as divisions (from a rootstock) also known as crowns. Plant crowns in mid-May 1 to 2 inches below the surface. Space 24 to 36 inches apart.
Hints: Perennial crop. Mulch with 8 to 10 inches of straw or manure in winter.
Harvest: Do not harvest until the second season, and then pull only those stalks that are at least 1 inch thick. Eat only the leafstalks. The leaf blades (leaves) contain oxalic acid and should not be eaten. Leave other stalks to replenish the plant for winter. Each plant yields 4 to 8 pounds over 6 weeks.
Spinach — Direct Seed • Frost Tolerant
Varieties:
- Spring-planted for early summer harvest: Bloomsdale Long Standing, Tyee, Olympia
- Late-summer-planted for fall harvest: Oriental Giant, Bordeaux
How to plant: Plant mid-April to early May. Sow seeds 4 to 6 inches apart. Plant seeds every 2 weeks for a steady supply.
Hints: Use heat- and bolt-resistant varieties for spring plantings. Savoy-type spinaches (has wrinkled leaves as opposed to smooth leaves) tend to be more cold tolerant.
Harvest: Allow 40 to 50 days to maturity. A 100-square-foot area yields 25 pounds.
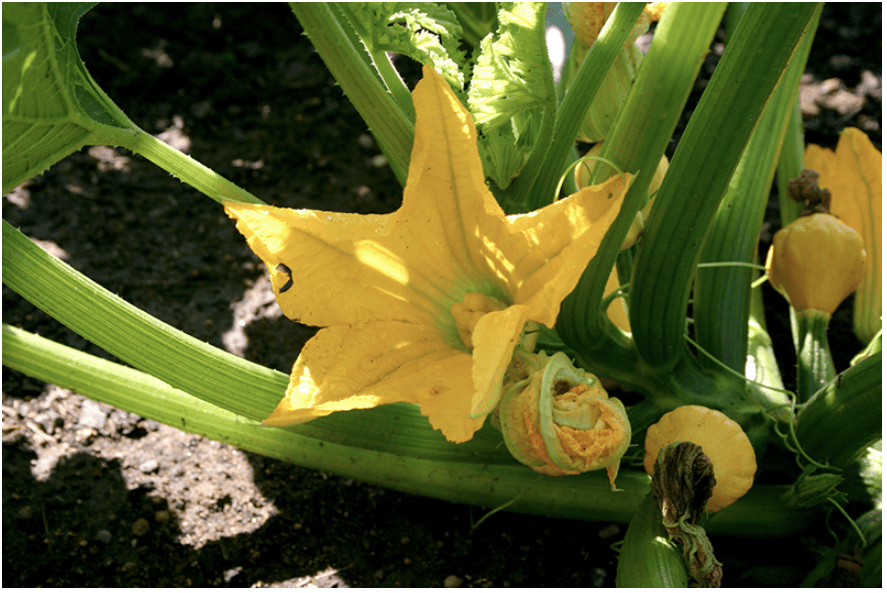
Squash, summer — Transplant • Frost Sensitive
Varieties:
- Yellow: Yellow Crookneck, Gentry
- Green zucchini: Raven, Floridor
- Yellow zucchini: Gold Rush, Butterstick
- Scallop: Sunburst, Sunny Delight
- Other summer: Tromboncino (C. moschata)
How to plant: Start seeds indoors in early May and transplant in late May to early June. Space plants 24 to 36 inches apart.
Hints: Protect from frost. Cool summers delay harvest. Summer squash needs lots of nitrogen. Temperatures above 90°F for several days in a row may cause flower buds to abort or slow down pollen tube growth and prevent fertilization, which can reduce fruit set. Consider hand pollination to increase yield.
Harvest: Start harvesting at 45 days and continue into fall. Harvest as an immature fruit—skin should be soft when pierced with your fingernail. Two hills yield 16 pounds in 8 weeks.
Squash, winter — Transplant • Frost Sensitive
Varieties:
- Buttercup: Buttercup, Bonbon
- Hubbard: Gold Nugget
- Kabocha: Black Forest
- Acorn: Honey Bear (compact), Table Queen, Cream of the Crop (white)
- Butternut: Early Butternut, JWS 6823 PMR, Waltham
- Heirloom: Delicata, Sweet Meat
- Spaghetti: Spaghetti, Tivoli
How to plant: Start seeds indoors around May 1. Transplant late May to early June. Space plants 24 to 36 inches apart.
Hints: Best results are achieved at elevations below 3,500 feet. Using heat sinks (e.g., rocks or retaining walls) or floating row covers for nighttime heat retention is highly recommended.
Harvest: Start harvesting at 85 days to 110 days from transplant. Harvest as a mature fruit when skin is firm and cannot be dented easily with your fingernail. Cut stem three inches above the fruit and leave attached. Let harvested fruits cure in the sun for 1 week before storing in a cool, dry location. Each plant yields 10 to 40 pounds depending on variety.
Tomatoes — Transplant • Frost Sensitive
Varieties:
- Very early: Oregon Eleven
- Early: Early Girl, Oregon Spring, Santiam, Oregon Pride, Oregon Star, Siletz, Legend
- Medium: Willamette, Medford
- Cherry type: Gold Nugget, Sweet Million, Sun Gold
- Paste: Oroma, Saucy, Viva Italia
- Heirloom: Brandywine (Sudduth’s Strain or potato leaf strain)
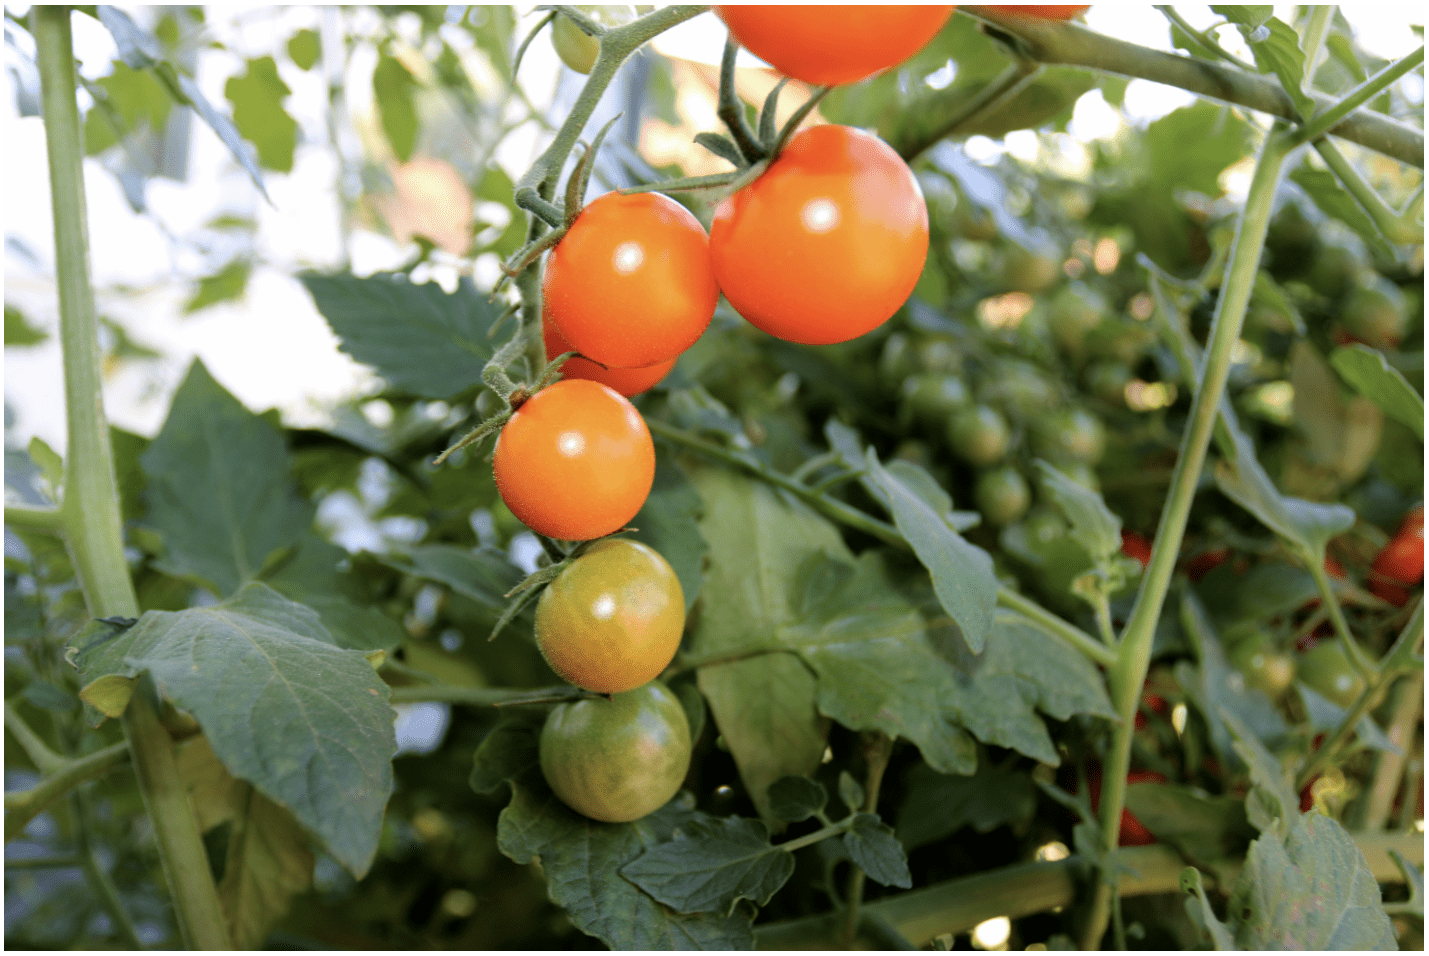
How to plant: Start seeds indoors 6 to 8 weeks before transplanting end of May, beginning of June. Place plants 18 to 24 inches apart. Place tomato cages around plants early in the season and pull new growth through the cages throughout the season for best support.
Hints: Have frost protection in place such as Wall O’ Water. Cover at night until established. Plant tomatoes in the warmest, most protected part of the garden. Avoid excessive nitrogen.
Harvest: Determinate tomatoes (bush type) are good for short season areas and for use in processing large batches of fruit. Determinate types will bear their fruit all at the same time. Indeterminate type will continue to flower and fruit until first frost. Each plant yields 5 to 20 pounds.
Watermelons — Transplant • Frost Sensitive
Varieties: Sugar Baby, Ruby, Blacktail Mountain, Shiny Boy
How to plant: Transplant 2- to 4-week-old plants the first week of June. Space plants 24 to 36 inches apart.
Hints: Use short-season or single-serving varieties. May be more difficult to grow at elevations above 3,500 feet. Plant in a protected area and use row covers, cloches, or cold frames. Plant in rocky areas for added heat retention.
Harvest: Watermelons do not continue to ripen off the vine. When harvesting watermelons, look for the first and second tendril closest to the stem end to have senesced (dried). This is one indicator of when the fruit is ripe or mature enough to harvest. Additionally, the ground spot (where the watermelon rests on the ground) should be slightly yellow; however, this is not always a consistent indicator of ripeness. Yield varies.
For more information
OSU Extension publications
- Acidifying Soil in Landscapes and Gardens East of the Cascades (EC 1585)
- A Guide to Collecting Soil Samples for Farms and Gardens (EC 628)
- Improving Garden Soils with Organic Matter (EC 1561)
- Laboratories Serving Oregon: Soil, Water, Plant Tissue and Feed Analysis (EM 8677)
- Soil Test Interpretation Guide (EC 1478)
- Vegetable Gardening in Oregon (EC 871)
- Vegetable Gardening Publications from the OSU Extension Catalog
Other publications
- Backyard Composting (EB 1784E)
- Herbicide Carryover in Hay, Manure, Compost and Grass Clippings: Caution to Hay Producers, Livestock Owners, Farmers and Home Gardeners
- Pollinator Fact Sheets from The Xerces Society for Invertebrate Conservation
- Pollinator Friendly Planting Guides from Pollinator Partnership
Use pesticides safely!
- Wear protective clothing and safety devices as recommended on the label. Bathe or shower after each use.
- Read the pesticide label—even if you’ve used the pesticide before. Follow closely the instructions on the label (and any other directions you have).
- Be cautious when you apply pesticides. Know your legal responsibility as a pesticide applicator. You may be liable for injury or damage resulting from pesticide use.
Trade-name products and services are mentioned as illustrations only. This does not mean that the Oregon State University Extension Service either endorses these products and services or intends to discriminate against products and services not mentioned.